

Hi everyone, I built a to generate up to 10,000 NFT collections with zero coding needed. On the site you can configure the rarity of each image and metadataAll you need to do is:

So you’ve recently aped into an NFT, but you can’t see it yet because OpenSea is very slow to render metadata under high demand. In some cases, you might be able to connect your wallet to Rarible and it might be able to render there.
If not, here’s how to find what your NFT actually looks like, using the TimePieces drop as an example.
Nifty Generator lets you generate NFT collections with different traits, complete with metadata for Solana or Ethereum—no coding needed. Just connect your image layers to our tool, and we’ll handle the generation!
Have you tried Nifty Generator?
Help others know if Nifty Generator is the product for them by leaving a review. What can Nifty Generator do better? What do you like about it?
- Nifty Generator’s news
- What is NFT Metadata?
- Upload your NFT images in the cloud
- [token_id]. json
- How it works
- Set rules and rarity
- Preview
- Export
- Why creators love Bueno
- Got morequestions?
- How to Make an NFT collection with Genfty. com
- Upload to IPFS
- Sell on opensea
- Step 2. Find your NFT’s Metadata
- Step 3. Plug in the IPFS URL
- Step 4. Voila!
- # Linking to NFT assets
- # ERC-1155
- # Deeper & dynamic metadata
Nifty Generator’s news
The most common format for NFT metadata is JSON (opens new window), the ubiquitous lightweight format first defined by the JavaScript language.
Since JSON is a lightweight format, it doesn’t impose any constraints on the structure of data within. Unlike XML, there’s no built-in schema definition language that can be used to specify a particular «flavor» of JSON for a given use case.
JSON Schema (opens new window) is a standard and a set of tools allowing you to define schemas for JSON objects. These schemas define the names of object properties, as well as what type of values are acceptable for each property. We’ll use JSON Schema to show definitions for the most popular metadata standards. If you have trouble reading them, have a look at the official JSON Schema getting-started guide (opens new window).
Generate, preview, edit and download your 10,000 NFT collection with metadata in minutes for free. Created for artists, zero code knowledge required.
Get StartedDemo Collection
Completely Free
NFT Export lets you generate and export unlimited NFT collections with no charge, no watermarks, etc. We’ve worked hard to bring a service like this to enable independent artists experiment with generative art and build amazing collections.
Easy-to-use
Create a production-ready NFT collection in a few easy steps:
Done! Your collection is ready to be deployed.
Coming soon
We’re working on the set of tools that will let you deploy your NFT collection to Ethereum, Polygon and Solana without writing a line of code. Join the waitlist to get early access when the toolkit is released.


Join the private club. Be the first to get free mint access to the upcoming 10k NFT collection.
Metadata (opens new window) is data that provides information about other data; in the case of an NFT, it describes that NFT’s essential properties, including its name, description, and anything else its creator feels is important. In many cases, an NFT’s metadata also contains links to the images and other «primary» digital assets that give an NFT its value.
Because NFT marketplaces leverage metadata to display NFTs to buyers and sellers, it’s important for that metadata to be in a format that marketplaces can understand. To make your NFTs compatible with as much of the ecosystem of marketplaces, wallets, and other NFT tooling as possible, you should adopt an existing metadata standard, and if need be, extend it with your specific needs.
This reference guide shows some of the most common and useful metadata formats used by NFTs today. If your favorite standard isn’t included, please open an issue (opens new window).

Our FeaturesEverything you needBuilt for artists and NFT creatorsSuper Simple (no code)Make NFT collectibles with ease, utilizing the all-in-one generatorExport to images or gifsYou can import images and we will generate your collection in the format your decide. Attribute RarityYou can configure certain attributes to be more rare than others. You will be able to easily tell what are the change for an attribute to be applied. MetadataNo Account NeededNo account creation required to begin making your collection. Automatic SavingWe automatically save your project in the browser, so when you come back, your layers, configuration and files are still present.
PricingUse for FREE
- 80 unique combination
- Unlimited Previews
- Collection Generation
- Generated Gif
- No watermark
- Limited Chat Support
- 1000 unique combination
- Unlimited Previews
- Collection Generation
- Generated Gif
- No watermark
- Priority Chat Support
- 5000 unique combination
- Unlimited Previews
- Collection Generation
- Generated Gif
- No watermark
- Priority Chat Support
- 10000 unique combination
- Unlimited Previews
- Collection Generation
- Generated Gif
- No watermark
- Priority Chat Support
ImageGenerator struct is used to generate the NFTs and respective metadata. Attributes for the ImageGenerator struct:
Enum to distinguish between the Ethereum and Solana networks
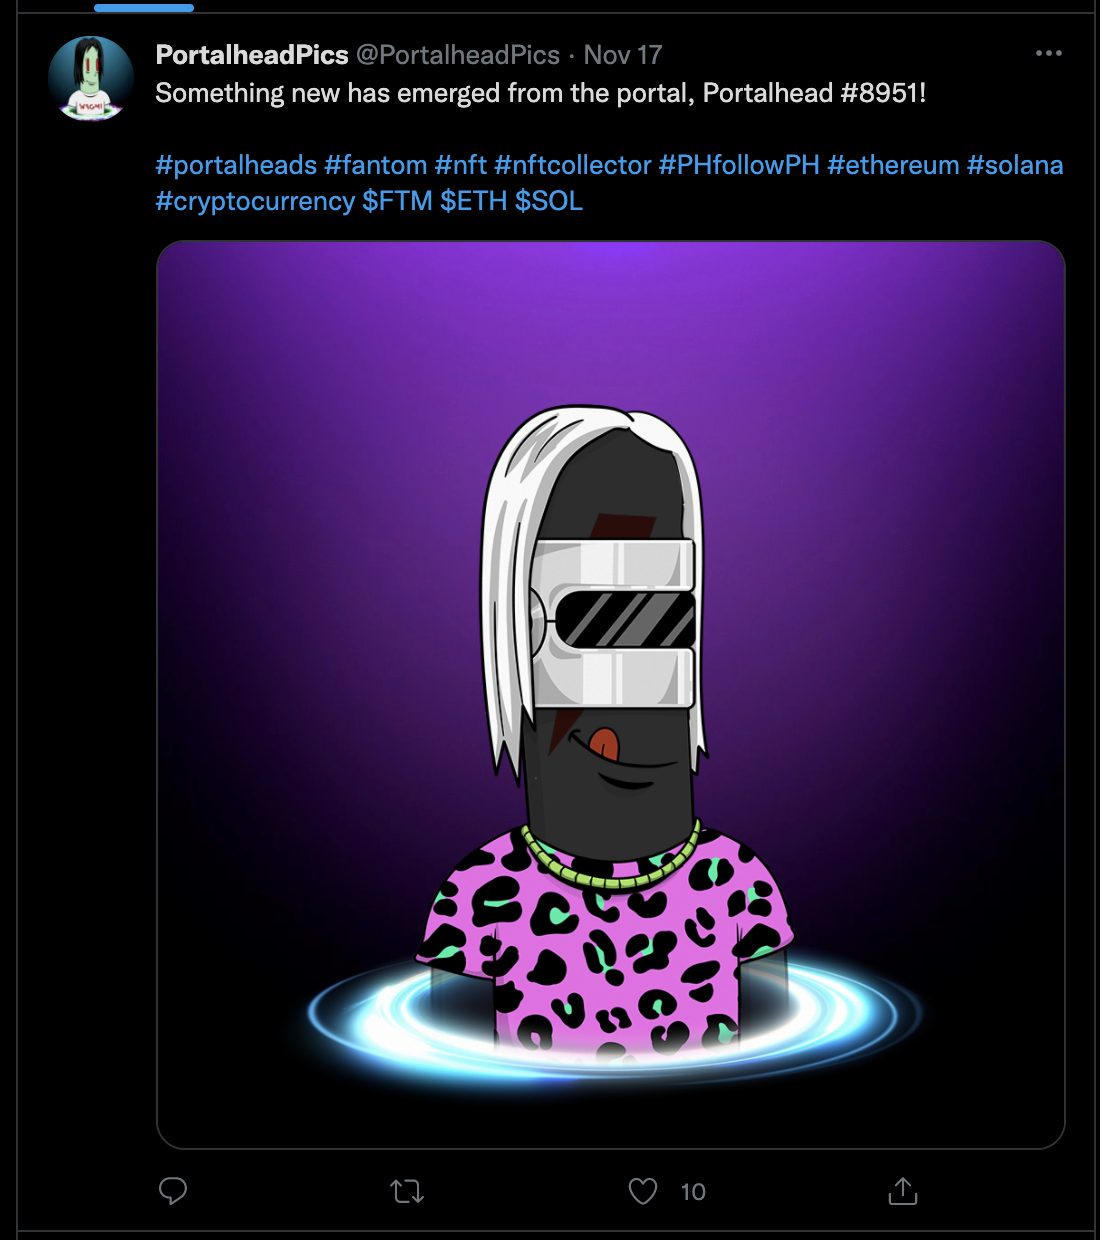
Empowering Creators with NFTs#Ethereum #Fantom #Syscoin #PFP #GenerativeArt #NFTArtist

Generative Art Engine for NFTsTakes input as a series of media files and creates a configurable number of entirely unique mintable NFTs. The output includes image assets, rarity data, and metadata JSON for all of the items compatible with all popular NFT marketplaces.
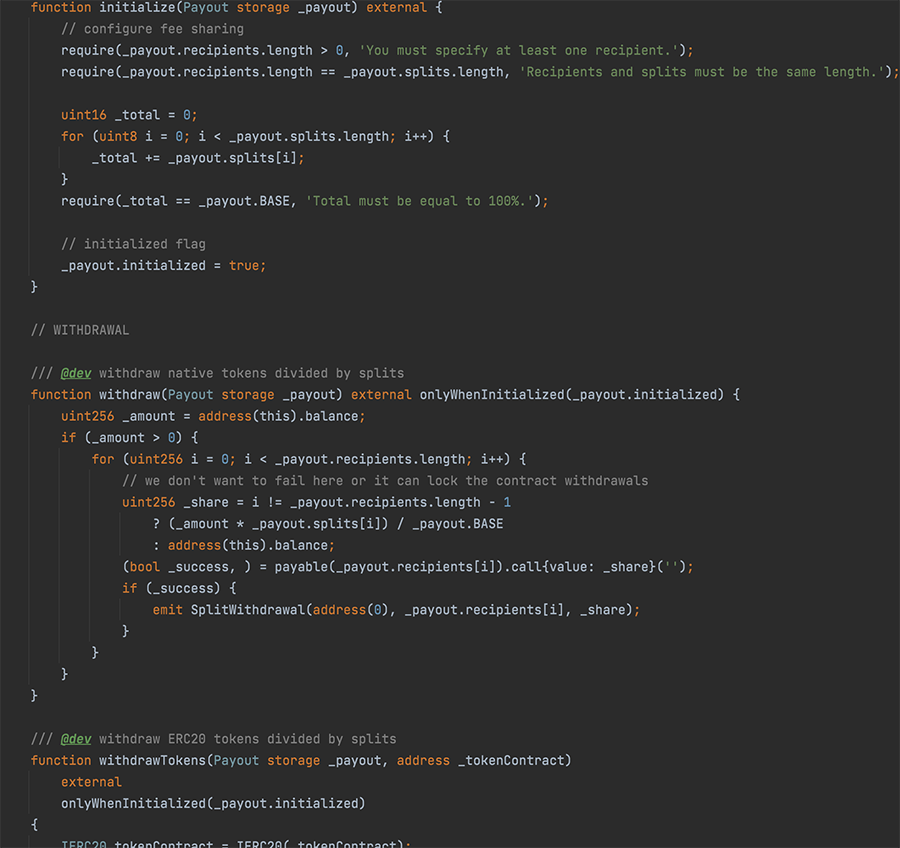
NFT Smart ContractsSupport for pre-sales and whitelisted pre-sale participants, giveaways prior to the minting date, instant-reveal or reveal minted items after some period of time, a variety of different sales formats (fixed price, english and dutch auction) and special tooling to prevent rarity sniping prior to items being minted. NFT Gen uses the ERC-721 specification but can also be used with ERC-1155. NFT Gen also creates provenance records with verifiable Merkle hashes to provide customers with the highest level of confidence in the NFTs produced for NFT Gen projects.
NFT Minting MicrositesStandalone Web3 enabled website for minting NFTs that can be configured to support a variety of different sales formats, designs, and storylines based on project’s needs and smart contract being used.

Custom NFT Metadata ResolverTake control of your customer’s NFT experience by ensuring data and media load quickly and reliably. Our custom metadata server stores and returns NFT metadata. It provides an alternative to third party IPFS pinning services. Allows for cloud hosted or on-premises hosting options.
TRUSTBV MEMBERSHIPFantom (FTM)
GEN ZEROESEthereum (ETH)
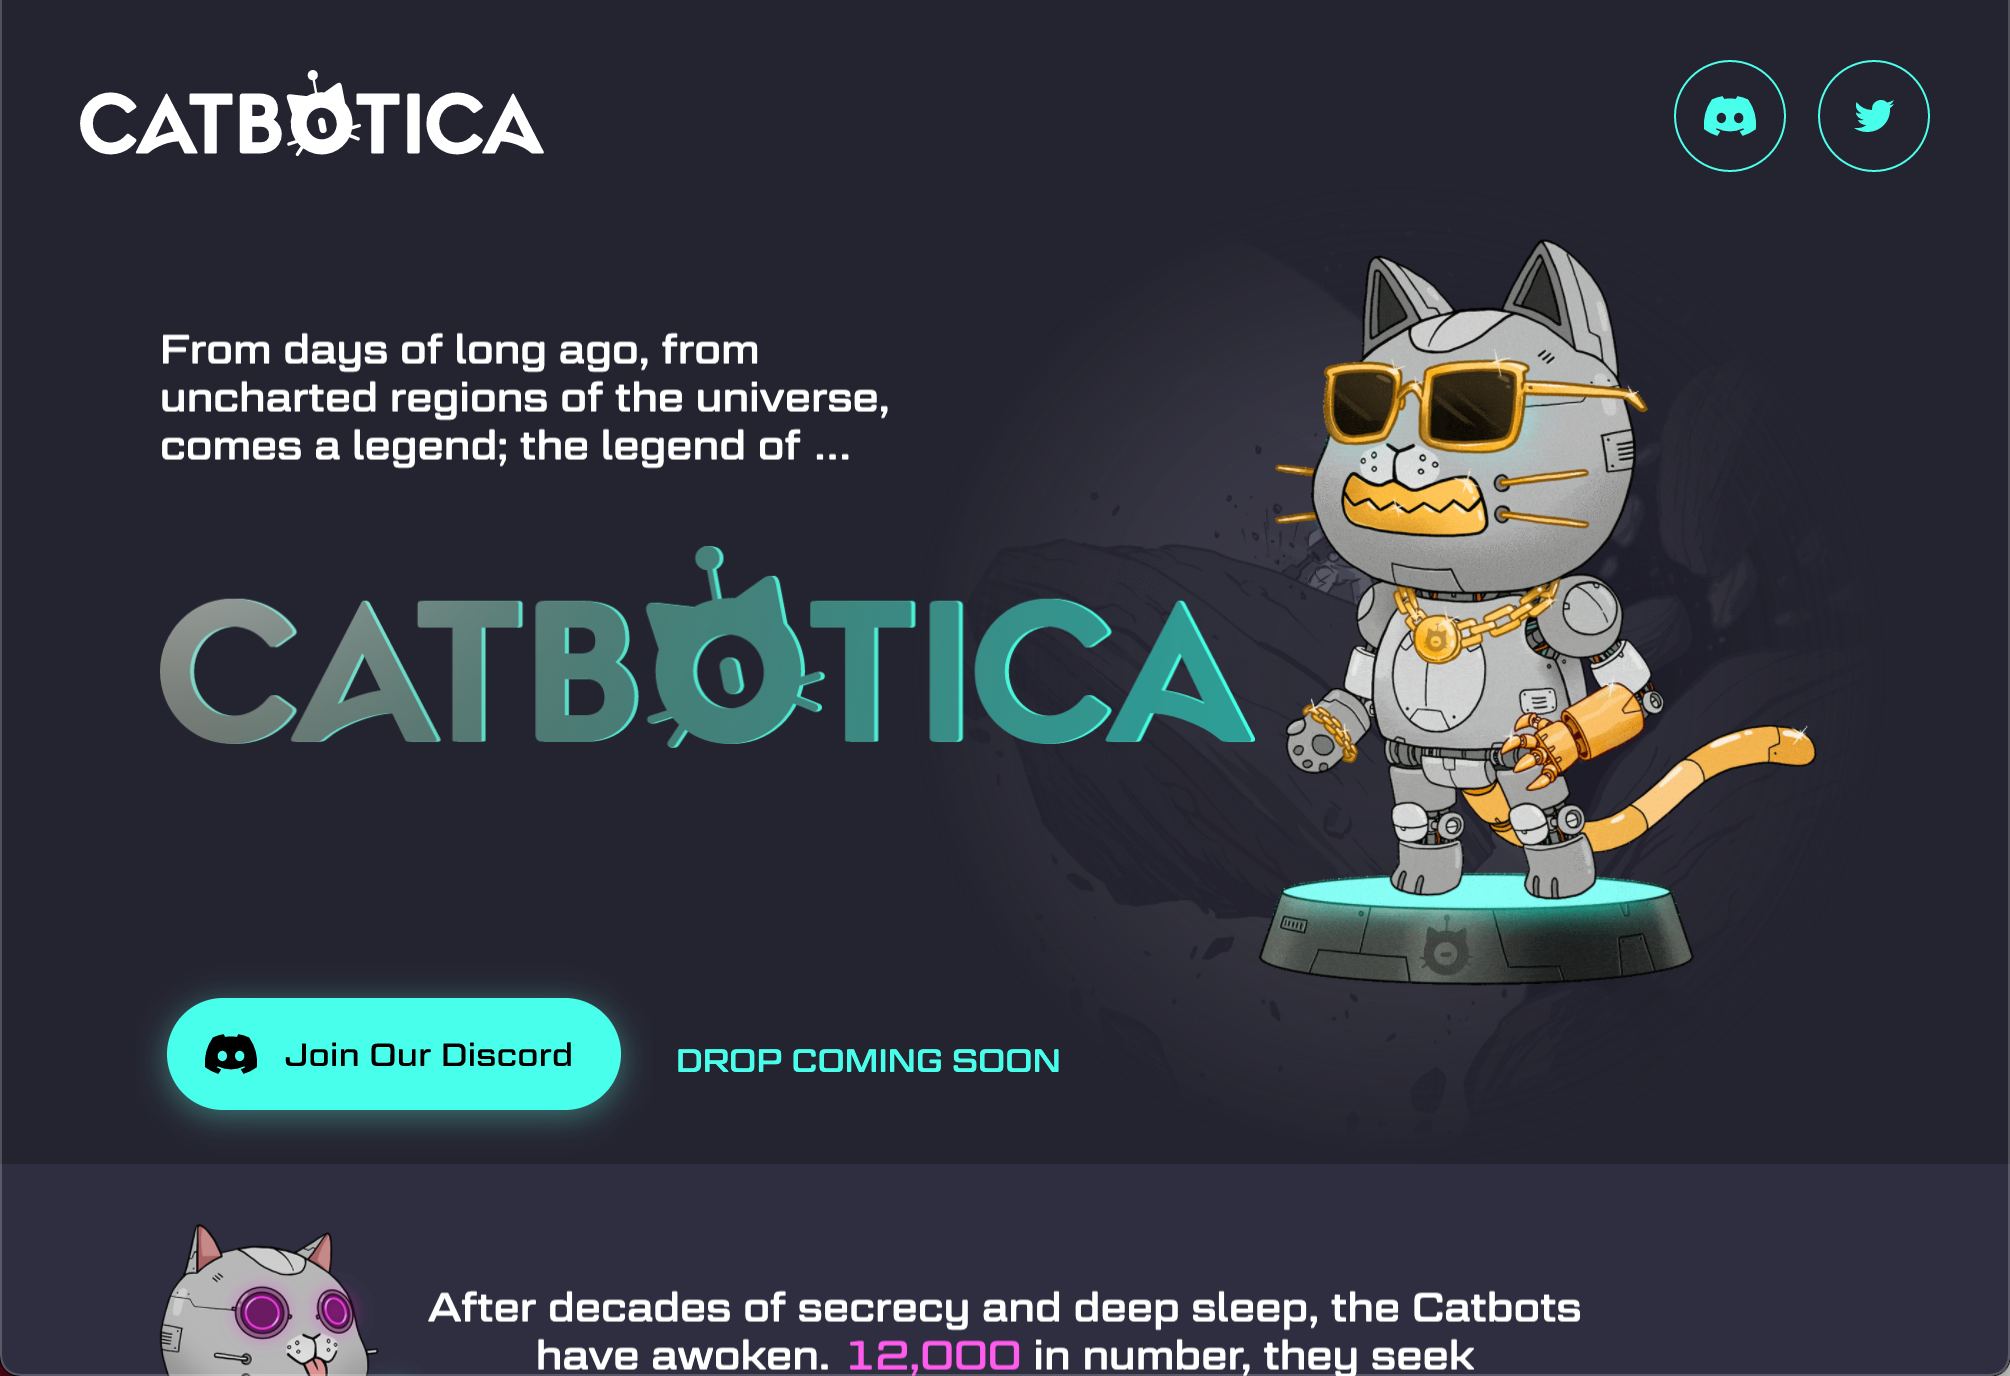
CATBOTICA (COMING SOON)Ethereum (ETH)
NFTEACHER MEMBERSHIPEthereum (ETH)
Request More InformationNFT Gen helps rapidly take content creators from raw-assets to launched NFT projects. Ready to take the next steps in launching your NFT collection?Tell use more about your project using the form below:Thanks for your interest! A confirmation email has been sent to the address you provided. Our team will review your submission and get back to your shortly.
In the last tutorial, we generated our NFT collection by using a Python library.
We will pick up from there and generate the respective metadata for the NFT collection by using our Python library once again.
The first thing we want to do is locate the images folder that contains our NFTs.
Right click on the images folder in Visual Studio Code and click on Reveal in Finder to see where the folder is located.
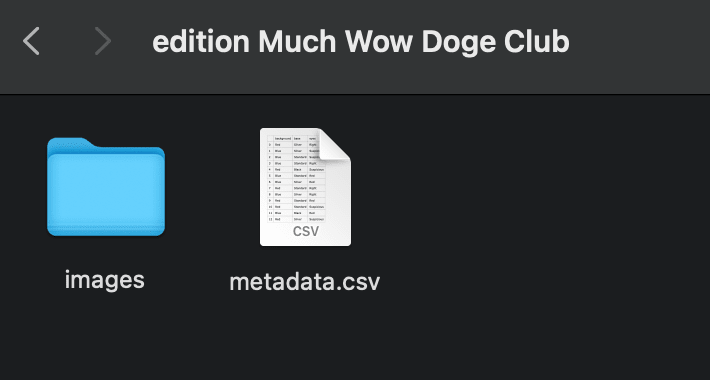
Have this folder at hand, we will come back to it.
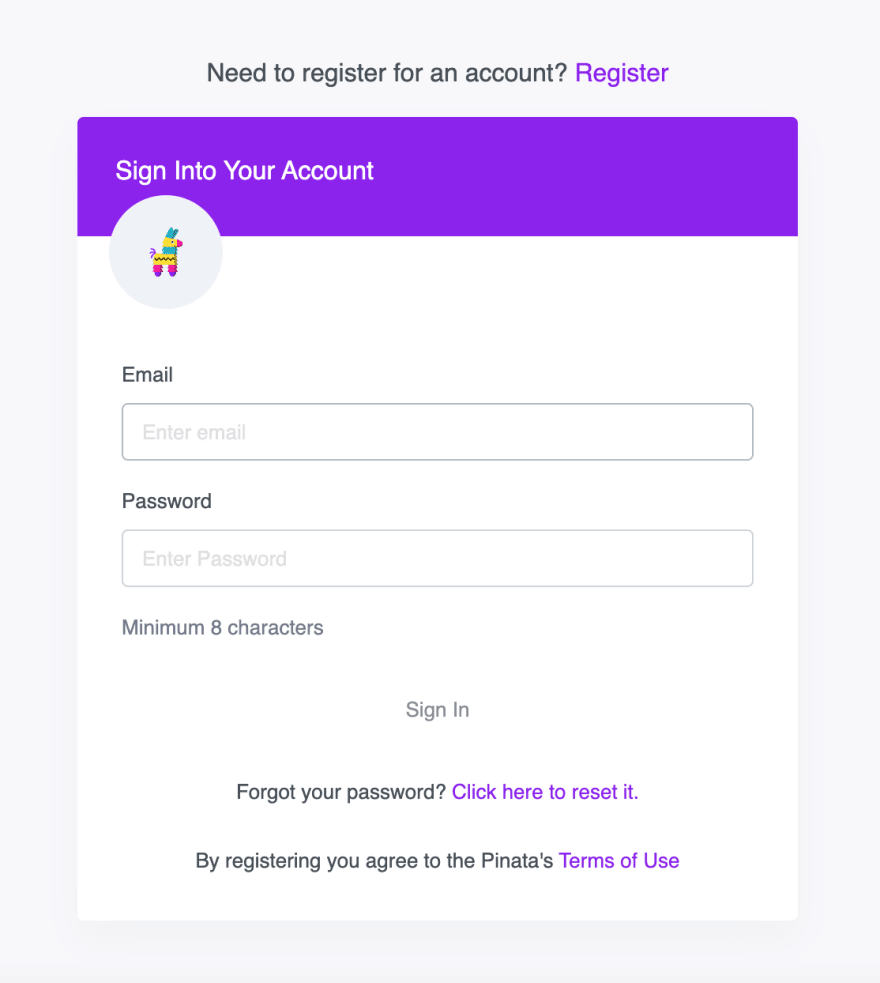
In the meantime, go to Pinata and create an account.
Pinata is the service that will use to host our NFT data.
After creating an account, login with you credentials.
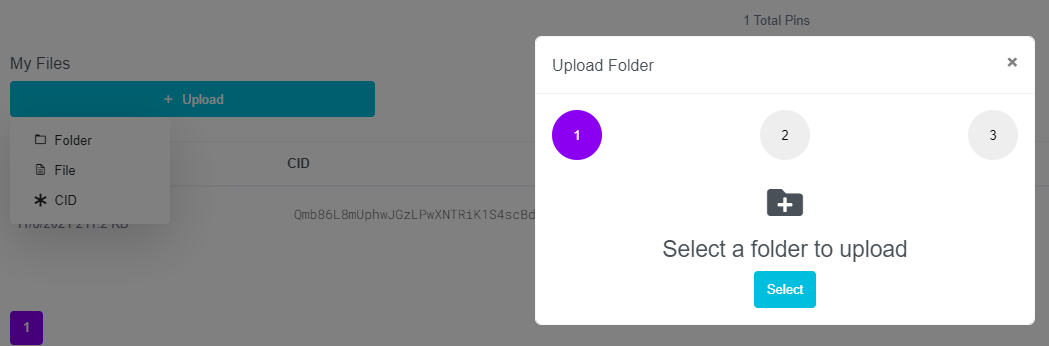
On the Pinata dashboard, go to Upload > Folder
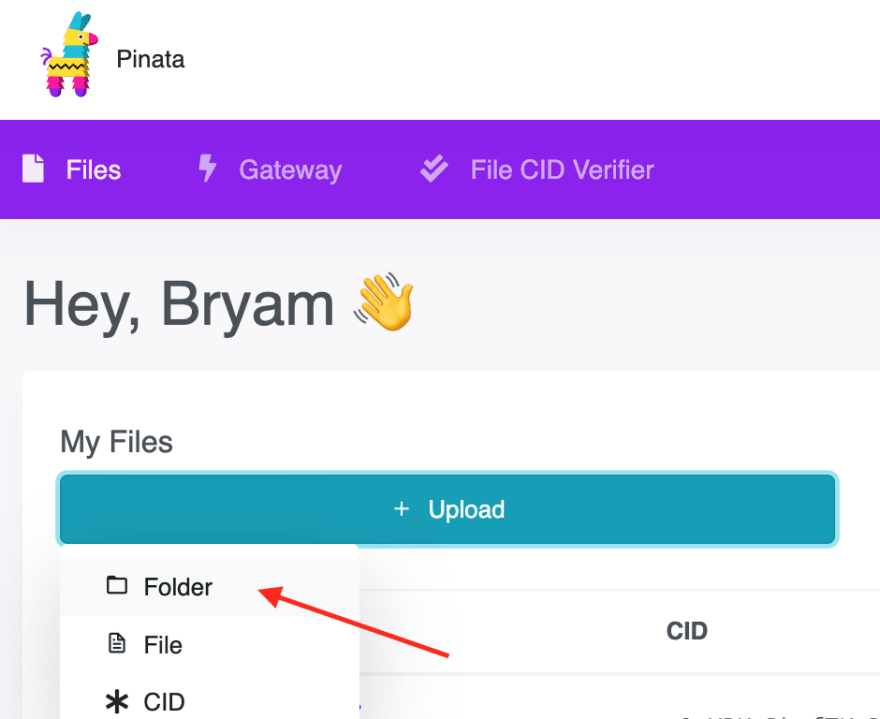
Click on Select and upload the images folder that we located earlier on.
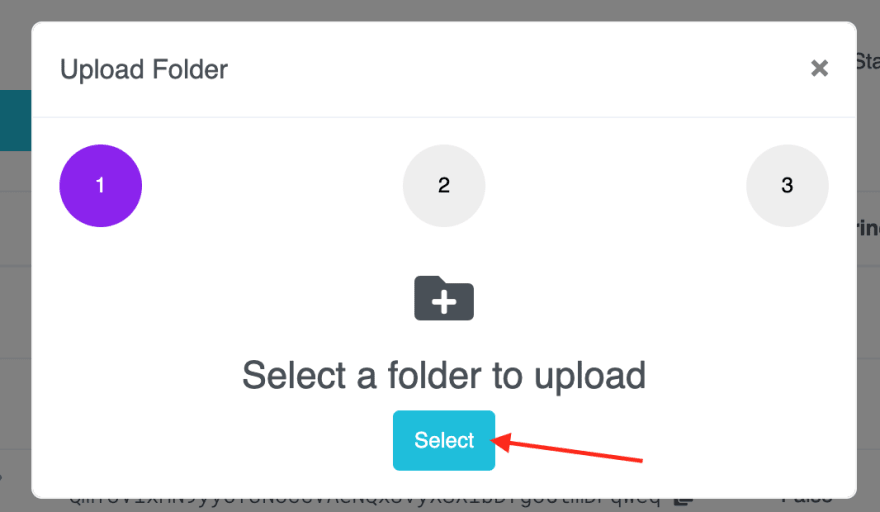
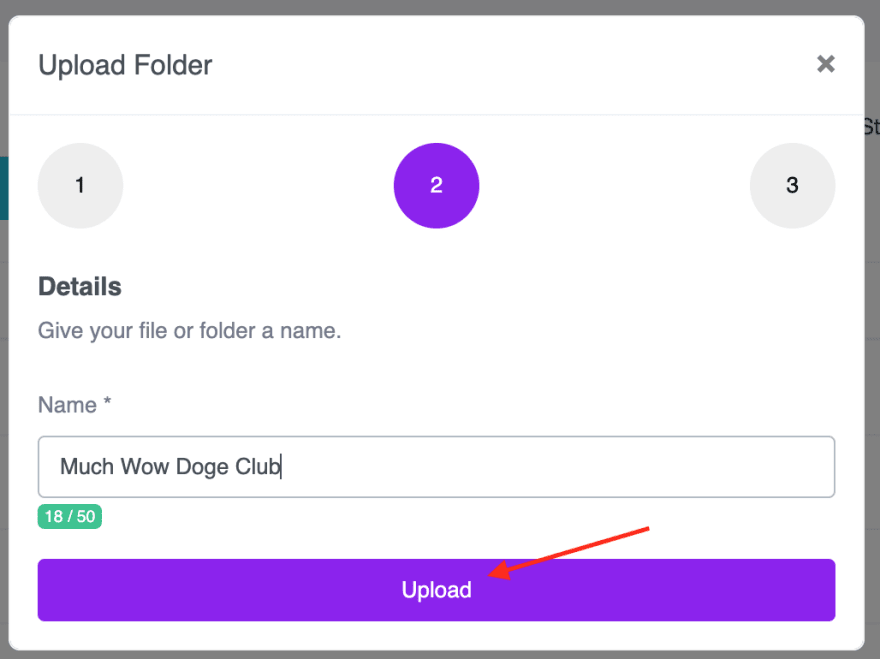
Give a name to the folder and click Upload.
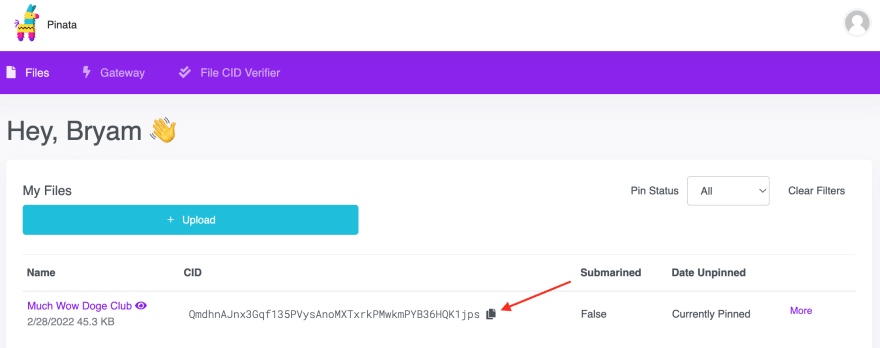
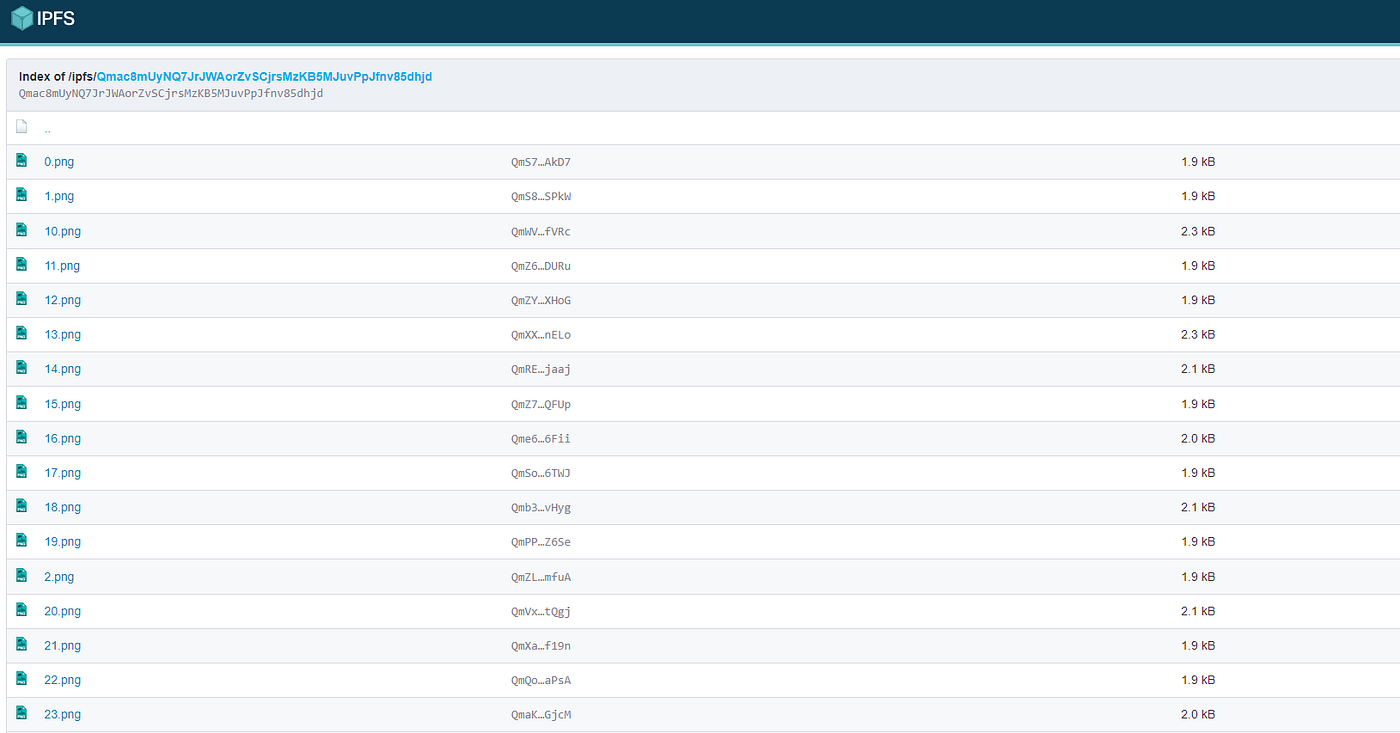
The folder will appear on your dashboard once the upload is complete.
Copy the CID for the folder.
Open Visual Studio Code and go to the metadata. py file.
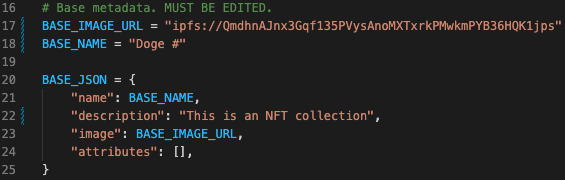
Locate lines 16 — 25 in the metadata. py file.

In line 17, paste the CID that you copied from Pinata. Make sure you pasted the CID correctly. It must go after the double forward slashes ( // ).
In line 18, choose a display name for the NFTs. In my case, I chose «Doge #», so when I generate the metadata, I will get something like «Doge #1» for the first NFT. «Doge #2» for the second one and so for and so on.
In line 22, add a description for your collection. It can be anything. Tell others about your collection.
Save the metadata. py file.
Enter fullscreen mode
Exit fullscreen mode
You will be prompted to enter the name of your edition.
Enter edition you want to generate metadata for:
Much Wow Doge Club
Enter the name of you NFT collection and press enter.
The command above will generate the respective JSON data for the NFT collection.
You will see a new folder on the left side of Visual Studio Code named json with the metadata for each NFT.
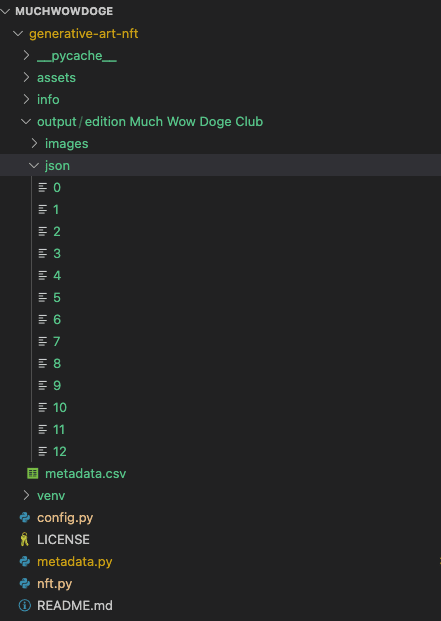
Feel free to explore the files in the json folder. These files are a description of each NFT. They contain the name of each NFT and its properties.
However, you might notice that the files in the json folder don’t have the. json extension. This seems to be a problem with the library itself.
What you can do is open the json folder and add the. json extension to all the files manually.
You can do this by selecting all files and renaming them in batch. You can do this on Mac and Windows.
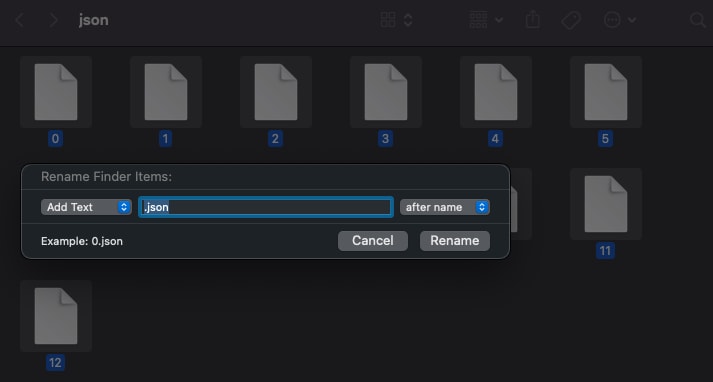
After adding the. json extension to the files, you should see them show up with the right extension on the left side of Visual Studio Code.

Finally, go to Pinata again and upload the json folder in the same way that we did with the images folder in the beginning of this tutorial.
In the end, your Pinata dashboard should have two folders; one for the images and one for the json files.

In the next tutorial, we will need the CID of the json folder, so keep that in mind.
This is where we end this tutorial, but in the next one, we will be deploying our NFT collection on OpenSea.
If you can’t wait to finish this series, you can check out the entire NFT video series which is already out on Youtube.
Don’t forget to subscribe!! 🙂
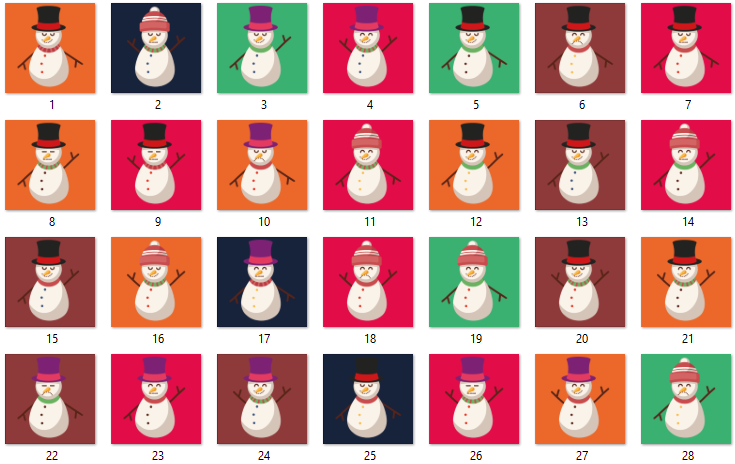
My Snowman NFTs Collection

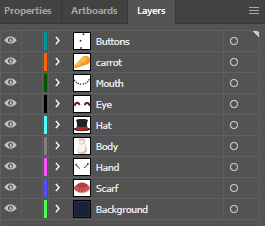
Layers list for my snowman
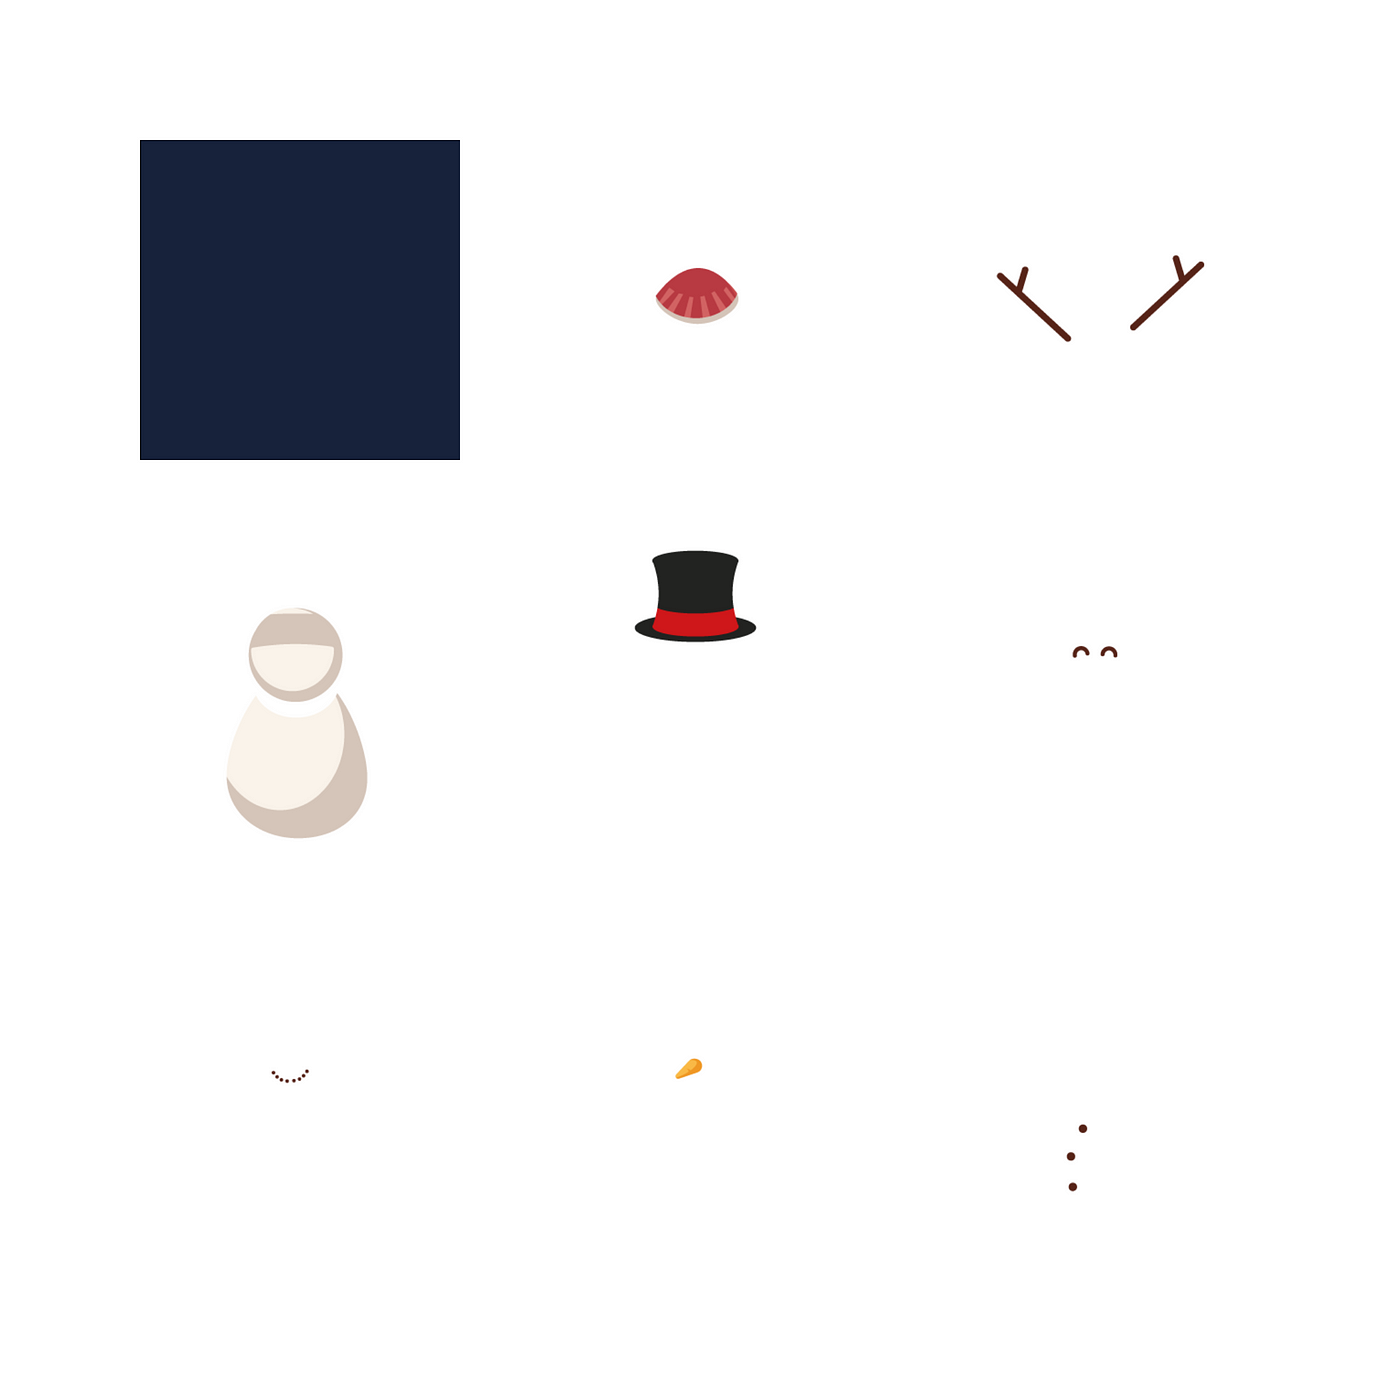
Layers of the snowman image
Snowman by layers

Layers collection of Snowman NFTs

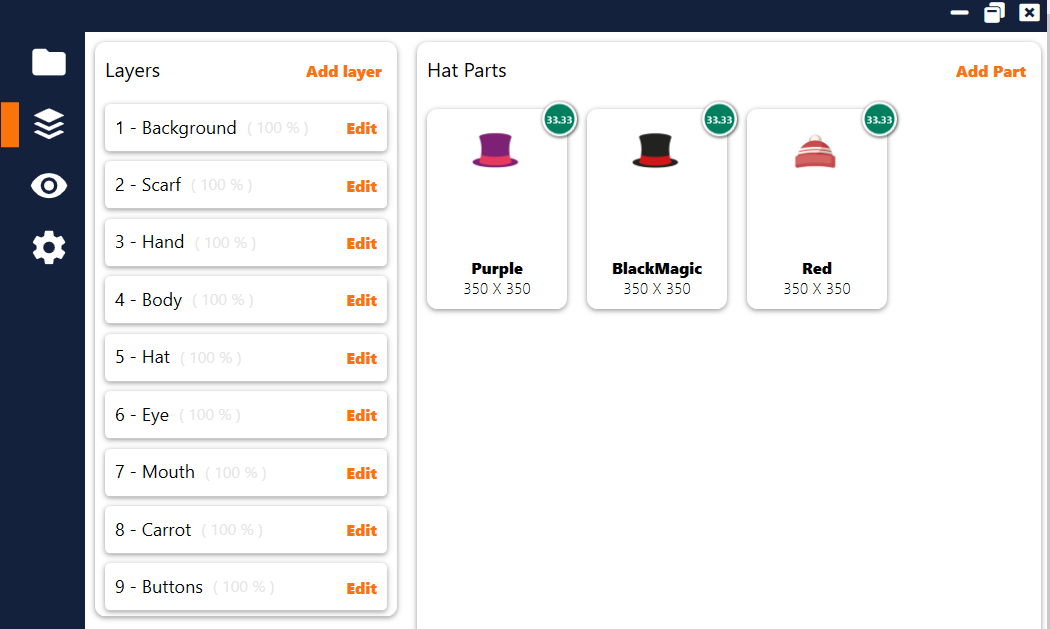
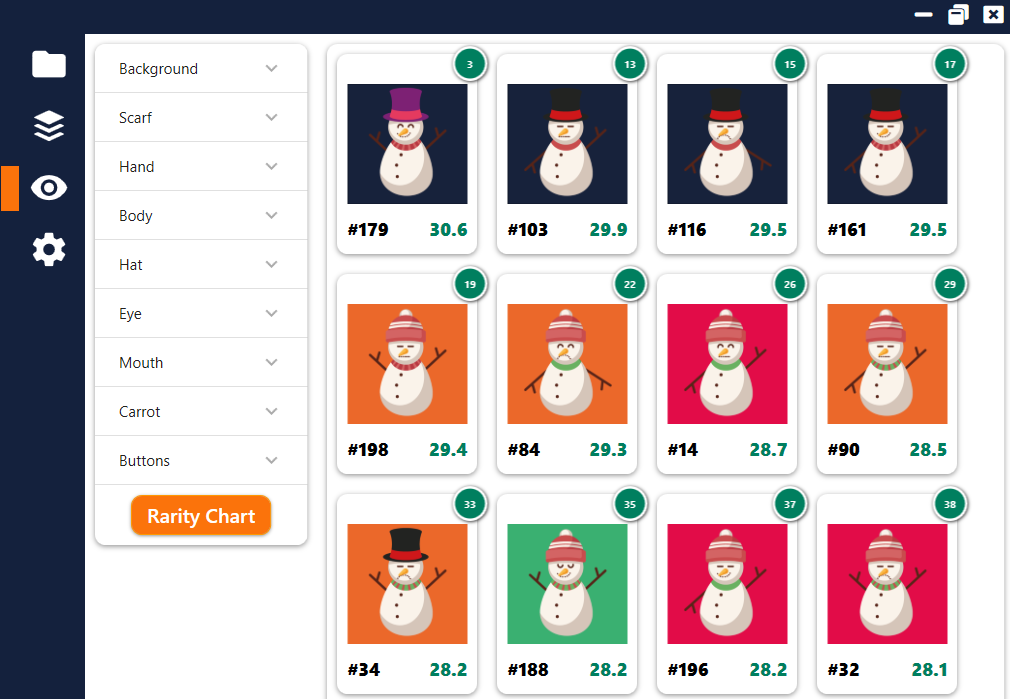
Image from NFT-Generator
Here is the metadata for the first NFT generated:So this is how you can build your 10,000 NFTs collection, as I did. I hope this article answered all your questions. And if you have more questions, feel free to ask me in the comments and I will be happy to help you.
What is NFT Metadata?
- NFT’s name
- Description of the NFT
- Link to the hosted image
- Traits
This NFT metadata will be the input of your NFT smart contract which you will deploy on the Ethereum network in the third part.

Upload your NFT images in the cloud
Pinata allows you to upload NFT images for free using IPFS (InterPlanetary File System). This is a distributed file-sharing system.
Sign up for a free account and upload your NFT images folder to the pinata cloud.
I called my project “NFT Creator” but feel free to choose a different name.
Pinata allows you to upload your entire folder at once
If the upload is successful, you should be able to see your uploaded files as shown below:
Click on your project and copy the link.
This is your “BASE URL”, which you will need later on.
[token_id]. json
Next, you want to create a specific. json file for each image:
- load in the all_traits.json
- Specify your images “BASE URL” which you copied earlier on the Pinata website. Make sure you add an additional “/” on the end!
- Specify your project name
- Loop over the all_traits .json dictionary using the keys accessor and output an individual .json file for each unique NFT image.
How it works
We’ll show you how to organize and upload your layers to get started.
Set rules and rarity
Play around with trait rules until you like what you see.
Preview
Check the art and metadata with as many previews as you like.
Export
Then when you’re ready, download your tokens and metadata. That’s it!
Why creators love Bueno

I find the Bueno Generator really inspiring creatively. You put all your traits into the tool and it creates really surprising NFTs.

MinaWonderPals
With Bueno, we saved time so we could focus on creating and growing our brand. These tools helped us see the huge range of possibilities for artists in the NFT space.

MaximPokey Universe
Bueno smart contract cost less than $100 to deploy. Thank you for making it as seamless as possible to launch my new NFT collection!
Got morequestions?
What are NFTs?
Some of the first NFTs ever made were PFPs, aka profile pics, designed to be used as avatars. CryptoPunks, Robotos, BAYC, Cool Cats, and Doodles are among the most famous PFP NFT projects.
Why should I use the Bueno Generator
Bueno takes away the complexity of coding and provides an easy-to-use interface to generate your NFTs so that you can focus on what matters most: the art and community. Upload infinite layers, control rarity, preview, and export your NFT art and metadata as quick as you can click.
What’s the pricing?
Use the Bueno Generator for free until you are ready to export. Pricing will vary depending on how many tokens you need to export:. 0001 ETH per token100 tokens is. 01 ETH1,000 tokens is. 1 ETH10,000 tokens is 1 ETH
Have more questions? Check out our Help Center.
How to Make an NFT collection with Genfty. com
Rarity feature allows to make your NFTs rare and valuable. NFT rarity decides how rare an NFT is and in turn, how valuable it is. Rare NFTs are most highly sought after by collectors, which pushes their prices up. This is why people want to know how rare an NFT in their collection is or whether the one they are planning to buy is a rare piece
Upload to IPFS
When you create and upload an NFT collection to IPFS, you get your CID which is used to define where your content (images, and metadata JSON files) are stored in the IPFS. Genfty. com generates your smart contract and all you have to do is copy the generated code and paste it to remix Ethereum to deploy your smart contract and mint NFT on polygon or Ethereum, just make sure that you mint your NFTs 100 by 100 for safe transactions
Sell on opensea
On your OpenSea (“OS”) profile page, locate the NFT of interest that isn’t rendering and head over to the details section of the page. This should show the contract address used for minting your NFT. It should be hyperlinked. Click on it!

Figure 1: Note your Token ID, and the Contract Address
Step 2. Find your NFT’s Metadata
Now that we’re on Etherscan, navigate to the “Contract” tab, and click on “Read Contract”.
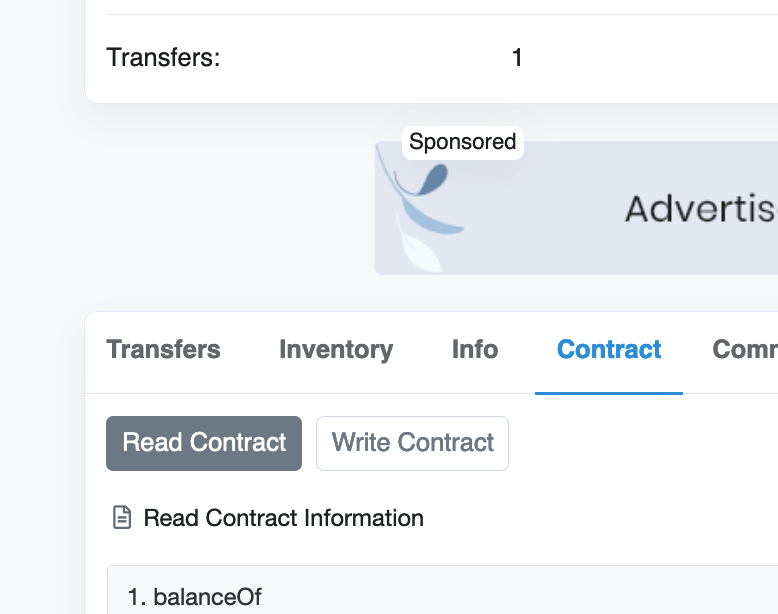
This will bring up a list of a bunch of functions that you can easily query using the Etherscan interface. Look for a function called “tokenURI”. Enter your NFT’s Token ID into the “tokenId” field. You should be able to see this id on the OpenSea properties field of your NFT (see figure 1).
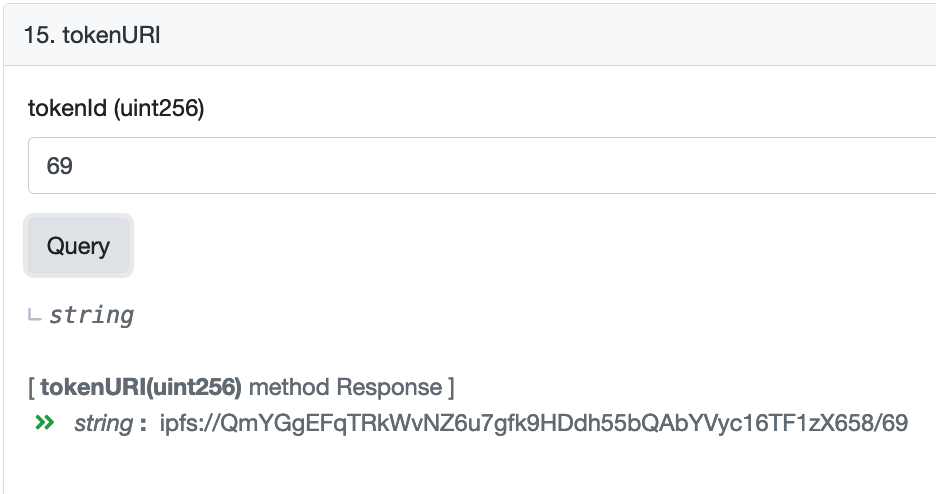
Copy everything after the “ipfs://”
I have “QmYGgEFqTRkWvNZ6u7gfk9HDdh55bQAbYVyc16TF1zX658/69” copied to my clipboard.
Step 3. Plug in the IPFS URL
This should either take you directly to your NFT, or a page with metadata about the NFT. In our case, we are taken to a page with a lot of different metadata about our NFT. No image yet!
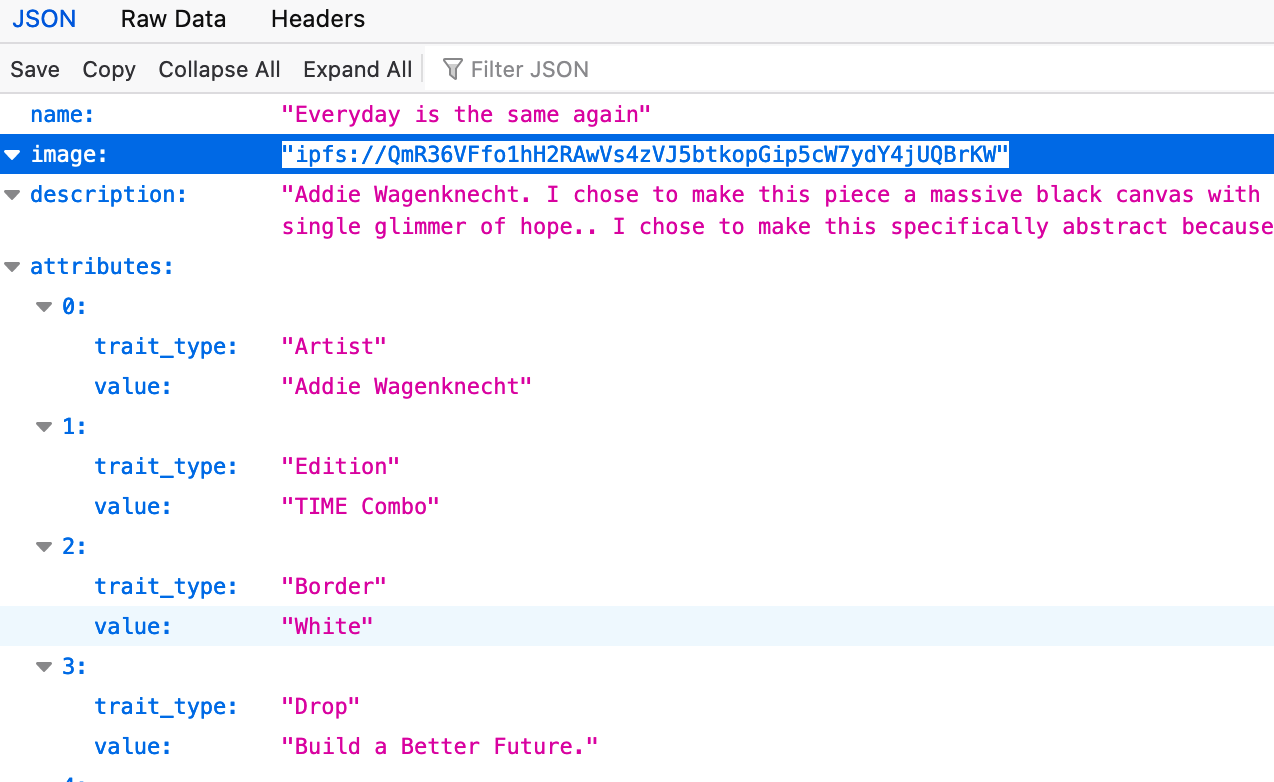
Whether we expect our NFT to be a video, gif, or a still-jpeg the final step is the same. Copy the text after the “ipfs://” just like we did in step 2, for the image field (highlighted in figure 4). This is the url we’ll need to take us to where the image is located on the IPFS network.
Step 4. Voila!

The NFT we’ve been waiting for! P. this is not my NFT.
If it’s a video and it isn’t loading well on your machine (as was the case for me), you can right click and select “Save Video As” — or the equivalent for your browser.
Hopefully this helped clear a few things up for you and made it easy for you to find out what your NFT looks like! In a future article, I hope to chat more about what IPFS is, and some of the pitfalls I see with it being the dominant network used to store most NFTs today.
# Linking to NFT assets
NFTs grew out of the Ethereum community, and the ERC-721 (opens new window) proposal was the first formal standard for interoperable NFTs to be widely adopted. Most of the standard is devoted to the smart contract interface that an ERC-721 token must adopt, but there’s also a recommendation for a baseline metadata schema:
This schema is deliberately minimal, and does not cover everything that you might want to put in your NFT metadata. However, because it’s a convenient baseline, the ERC-721 schema has been widely adopted and extended by many marketplaces and NFT smart contracts.
Many ERC-721 compatible contracts have adopted the OpenSea metadata recommendations (opens new window), which suggest conventions for additional fields that are broadly useful for common types of NFTs.
# ERC-1155
The ERC-1155 metadata schema is very similar to the one proposed in ERC-721. Since it only adds a few additional properties, tools supporting ERC-721 should support ERC-1155 metadata as well, though they may ignore the extra fields.
The most generally useful field is the properties object, which allows you to extend the schema with your own arbitrary properties without adding fields to the top-level namespace.
# Deeper & dynamic metadata
When you initially mint an NFT, there’s an on-chain field called tokenURI, which points to your metadata’s CID — this is where marketplaces look to when reading all of the information pertaining to an NFT’s metadata. The default ERC721 contract does this by taking the baseURI of the contract and automatically concatenates it with the token’s ID when tokenURI is called. For instance, if you were to upload a directory of metadata files, it would look something like this, where the entire parent folder houses each metadata file that corresponds to a token ID:
Once this folder is uploaded to the IPFS network, the proper CIDs are created such that the parent directory is at some CID (stored as the baseURI), and each metadata file can be accessed like a standard file path (e. , baseURI/tokenId could look like bafybeihxyqfz4u3hkkxo67sqb4no3hc4qvcuuk4niw4tia2ong2koz5tmq/1).
But, what if you want to change, or mutate, the metadata itself, making it dynamic? Recall that CIDs are unique and immutable; once a file/folder is uploaded, you cannot change the underlying data without changing the CID. For example, if you wanted to alter the trait_type **of Background from Green to Red, the CID would change. And since the on-chain tokenURI points to the metadata’s CID, you would have to try and change that on-chain CID, which might not be possible without the proper planning.
So, how can you make an NFT dynamic? Here are a few options, each with certain tradeoffs:
- Some people will end up hosting metadata on their own server but continue to host the actual files (e.g., an image) using IPFS/Filecoin. It’s a hybrid approach that allows the metadata to be easily changed without altering the on-chain data.
- Host the metadata on-chain
If you can define all of your metadata changes when you initially mint (or later upgrade) the NFTs, then you can programmatically point to on-chain metadata.The obvious drawback is you’d have to know all of the possible metadata mutations that could take place, plus, again, the cost factor; it’s very expensive(opens new window) to post this data on-chain. Projects that go down this path may choose to do so as a final “freezing” of the metadata on-chain, but it removes flexibility on any subsequent metadata changes and is only realistic for a subset of use cases. - If you can define all of your metadata changes when you initially mint (or later upgrade) the NFTs, then you can programmatically point to on-chain metadata.
- The obvious drawback is you’d have to know all of the possible metadata mutations that could take place, plus, again, the cost factor; it’s very expensive(opens new window) to post this data on-chain. Projects that go down this path may choose to do so as a final “freezing” of the metadata on-chain, but it removes flexibility on any subsequent metadata changes and is only realistic for a subset of use cases.
- For example, inherit from ERC721URIStorage(opens new window) and/or implement it’s functionality for updating the tokenURI. The standard ERC721(opens new window) contract’s tokenURI method simply returns the baseURI/tokenId, but ERC721URIStorage allows for a URI to be stored on-chain and would store a CID instead.
- Augment nft.storage(opens new window) with additional tools that add a layer of indexing and querying to the metadata, thereby, enabling dynamism and composability of your NFT assets.
Similar to the above, this approach also comes with nominal gas fees when changing table states (e.g., when updating attributes of an NFT) on EVM-compatible L1/L2s. Plus, the ability to leverage L2s allows for a very efficient solution that provides a new level of dynamism, composability, and access control. - Similar to the above, this approach also comes with nominal gas fees when changing table states (e.g., when updating attributes of an NFT) on EVM-compatible L1/L2s. Plus, the ability to leverage L2s allows for a very efficient solution that provides a new level of dynamism, composability, and access control.
Find your NFT’s Metadata Look for a function called “tokenURI”. Enter your NFT’s Token ID into the “tokenId” field. You should be able to see this id on the OpenSea properties field of your NFT (see figure 1)
To make an NFT represent something, we use metadata. Metadata is data that provides information about other data, in the case of an NFT, it describes that NFT’s essential properties, including its name, description, and anything else its creator feels is important
To calculate how many unique NFTs you can make from your layers, get the product of the number of variations for each layer. With my layers, I can make 4 x 4 x 3 x 1 x 3 x 3 x 3 x 1 x 4 = 5,184 unique NFTs. To make 10,000 NFTs, you need 10 layers with 4 variations each