- Gible – React Next NFT Marketplace Template
- Artlink – NFT Marketplace Template
- Tokimart – React. js NFT Marketplace Template
- Unitar – React NFT Marketplace Template
- Axies
- Novally – Vue JS NFT Marketplace Template
- Magellano
- Nftcrazy
- Bidzen – NFT Marketplace HTML Template
- Gigaland – NFT Marketplace React JS Template
- Wrapping Up
- Как работает торговая площадка NFT?
- Стек технологий, необходимый для создания торговой площадки NFT
- Блокчейн-платформы
- Платформы хранения
- Стандарты NFT
- Front-end Frameworks
- Как разработать NFT Marketplace с помощью IPFS и Flow?
- Инструменты настройки
- Контракты
- Minting NFTs
- Отображение предметов коллекционирования NFT
- Получение NFT из FLOW
- Получение медиа из IPFS
- Перенос NFT
- Развертывание и выпуск токенов
- Разработка торговой площадки NFT
- Поддержите блог, перечислив небольшие чаевые
- Latest News
- How to create NFT item
- How to sell NFT item
- Where to sell NFT item
- Main Features
- Support
- Images in the previews
- fonts
- Find the Best HTML Templates for NFT Websites on ThemeForest
- 12 Best HTML Templates for NFT Websites in 2022
- Gigaland — NFT Marketplace Template
- SaaSio — One Page SaaS NFT HTML Template
- Nuron — NFT Marketplace HTML Template
- Raroin — NFT Marketplace HTML Template
- Vie — Creative Agency NFT Template
- Unitok — NFT Marketplace HTML Template
- Axies — NFT Marketplace HTML Template
- EnftyMart — NFT Marketplace HTML Template
- Ethoz — NFT Website Template
- Monteno — NFT Portfolio HTML Template
- Cybox — NFT Collection HTML Template
- Cryptoki — HTML Template for NFT and Digital Marketplaces
- 5 Tips to Build a Better NFT Website
- Pick a Niche
- Consider Your Branding
- Parallax Scrolling is Your Friend
- Optimize Navigation and Search
- Invest in Top-Notch Security
- Create Your Own NFT Website Today!
- More Crypto & NFT Template Collections and Freebies!
- Project setup
- Setting up Tailwind CSS
- Configuring Hardhat
- Smart Contract
Gible – React Next NFT Marketplace Template

For the NFT Crypto Art Digital Assets Marketplace website, Gible is a clean, modern React Next template. It is built with ReactJS, Next.js, Strapi CMS, PostgreSQL, and Bootstrap, and it’s free of jQuery! This template is appropriate for NFT marketplaces, collectibles, NFT world buying, and selling, crypto art, digital art, and DeFi sites.
The template is SEO-friendly and contains source code that is simple to read and understand. This template is very adaptable. And, the extensive instructions will assist you in doing so.
Live Preview Details / Download
Artlink – NFT Marketplace Template

NFT Marketplace Template Artlink is an NFT Marketplace Template that specializes in NFT. NFTs are simple to create, buy, sell, auction, and utilize. The code is clean, well-optimized, and allows any developer to customize it to their liking.
It’s also a multi-purpose machine-readable text mark-up language with the most recent Bootstrap v5.1.3 version. This is a wonderful and useful guide to creating any virtual items. Items such as crypto art markets, digital asset bidding, and digital marketplaces for crypto-collectibles and non-fungible tokens.
Live Preview Details / Download
Tokimart – React. js NFT Marketplace Template

Tokimart is a React.js NFT Marketplace Template with Bootstrap 4. It is a fully responsive template that is compatible with all screen sizes. It has major browser compatibility. With Tokimart, you will get clean and a modern design. Moreover, there are custom icons, font awesome icons and W3C validated code. Learn more about the template from the button below.
Live Preview Details / Download
Unitar – React NFT Marketplace Template
Unitar is a Bootstrap 4 React.js NFT Marketplace Template. It’s a fully responsive template that works on any device with a screen size of any size. It supports a wide range of browsers. You will receive a clean and modern design using Unitar. There are custom icons, font awesome icons, and a lot more. The button below will take you to a page where you can learn more about the template.
Live Preview Details / Download
Axies

The NFT Marketplace for traders and creators is Axies. It brings collectors and artists together by allowing them to trade and exchange works in the form of non-fungible tokens. Working with the marketplace is very straightforward for creators. It all begins with uploading an item to a blockchain, after which you can trade it as a non-fungible asset.
This template comes with several customization options to help you achieve the look you want for your website. It’s simple to use and adjusts to different screen sizes.
It has both light & dark modes, over 9 major homepage styles, multiple subpages, and a lot of other cool features. Make sure to check them out.
Live Preview Details / Download
Novally – Vue JS NFT Marketplace Template

Novally is a Bootstrap 4 Vue.js Template. It is a fully responsive template that will operate on any device with any screen size. It works with a wide range of browsers. When you choose Novally, you will get a clean and modern design. Custom icons and Font Awesome icons are also there. The button below will lead you to a website where you can learn more about the template.
Live Preview Details / Download
Magellano

Magellano is a modern HTML 5 site template for NFTS marketplaces, digital products, and non-fungible tokens. It looks attractive, intuitive, and user-pleasant on all devices because it has a mobile-first strategy. You can use CSS variables or SCSS to adjust primary colors.
The template contains a ton of features. For example, lazy load images, 1500 Retina icons font, dark/light mode, Working PHP forms with antispam protection, supported by all major browsers, and a lot more. From the button below, learn more about the template.
Live Preview Details / Download
Nftcrazy
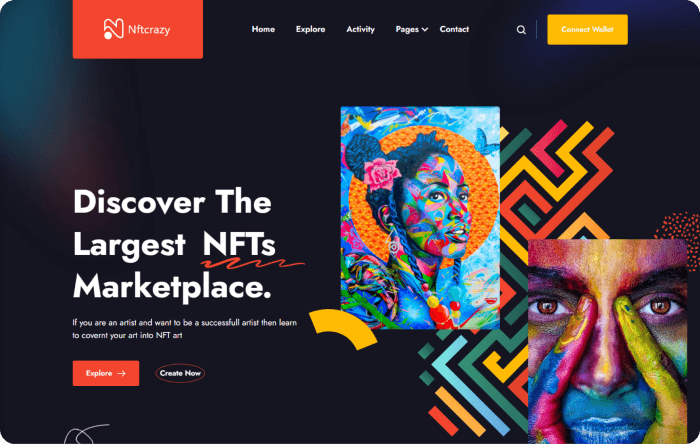
Nftcrazy is an NFTs marketplace template with a lot of features. It’s a fully responsive, pixel-perfect, and feature-rich template for NFTs, crypto-collectibles, digital products, non-fungible tokens, MetaMask integration, and more. Also, it is simple to customize, navigate, and adjust to different screen sizes. It is a fully responsive layout that works on any device.
Live Preview Details / Download
Bidzen – NFT Marketplace HTML Template

Bidezen is another great NFT Marketplace template with Figma. The template is available for Non-fungible tokens, crypto-collectibles, fashion, digital art, crypto art, and a slew of other things To make an online marketplace.
The NFT game makes it simple to buy, sell, trade, and auction items. There are sections, such as Item (Auctions), Item Detail, Creators, Authors, login, Signup, Wallet Connect, etc. And there are other necessary features like Dark-Light Version, W3C code, and more.
Live Preview Details / Download
Gigaland – NFT Marketplace React JS Template
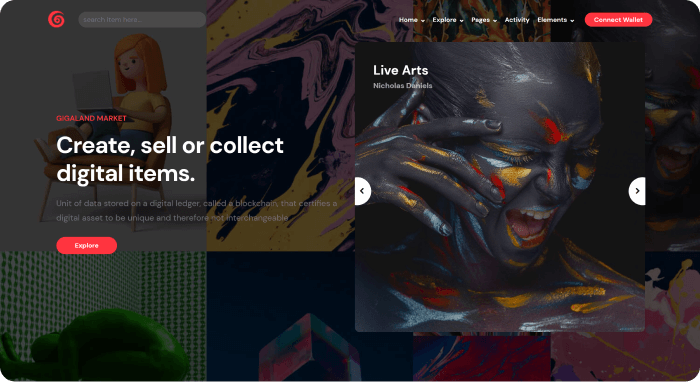
Gigaland is a pixel-perfect, responsive, and feature-rich React template for NFTS, crypto-collectibles, digital things, non-fungible tokens websites, and more. Also, Gigaland offers a variety of designs and elements to assist you in quickly creating a beautiful and modern website. It has the most up-to-date technology, such as Bootstrap 5.
Moreover, there are features like API & integrated Redux market item, Particle effects, Bootstrap components compatible, Styled Component, 11 homepages, Dark and light color scheme, and more.
Live Preview Details / Download
Wrapping Up
Finally, your search for the Top 10 Best NFT Marketplace Templates appears to have come to a close. With the help of these templates, you can easily create an NFT Marketplace with less time and effort. They offer features that would take a developer hours to create. Creating an eye-catching NFT Marketplace with a fantastic user experience and cutting-edge technology is also a demanding undertaking.
Thank you for taking the time to read this.
Как работает торговая площадка NFT?
Прежде чем углубляться в то, как создается торговая площадка NFT, важно понять, как работает торговая площадка NFT со стороны клиента. Обычно все платформы NFT используют схожий рабочий процесс:
- Во-первых, пользователь должен зарегистрироваться на платформе и установить цифровой кошелек для хранения NFT.
- Затем пользователи могут создавать свои активы, загружая элементы для демонстрации своей работы.
- Пользователь также может выбрать, какие платежные токены он хотел бы принять за свое искусство, и установить комиссию, если платформа предлагает это.
- Следующим шагом в рабочем процессе является составление списка выставленных на продажу товаров.
- Пользователь может выбрать ставку по фиксированной цене или аукцион.
- При выставлении объекта на продажу создается транзакция для запуска личного торгового смарт-контракта для кошелька пользователя.
- Платформе может потребоваться модерация коллекции, и NFT появятся в списке после утверждения.
Стек технологий, необходимый для создания торговой площадки NFT

Блокчейн-платформы
- Ethereum (Ethereum — одна из самых популярных платформ, когда дело доходит до рынка NFT или разработки невзаимозаменяемых токенов. Поскольку история транзакций и метаданные токенов доступны для публичной проверки в Ethereum, легче доказать историю владения. Поскольку все продукты Ethereum имеют общий бэкэнд, NFT становятся переносимыми между продуктами. Кроме того, Ethereum никогда не падает; следовательно, токены всегда будут доступны для продажи.)
- Flow (Flow — это быстрый и децентрализованный блокчейн, разработанный для нового поколения цифровых активов, приложений и игр. Платформа широко используется для создания как торговых площадок NFT, так и NFT с использованием языка программирования Cadence.)
- Tezos (Tezos — это блокчейн-платформа с открытым исходным кодом для приложений и ресурсов, поддерживаемая сообществом разработчиков, исследователей и валидаторов. Используя предварительно скомпилированный контракт FA2 NFT, написанный на языке смарт-контрактов LIGO, Tezos поддерживает развитие торговых площадок NFT.)
- Cardano (Cardano — это блокчейн-платформа с технологиями и инструментами, необходимыми для обеспечения непревзойденной безопасности и устойчивости децентрализованных систем и приложений. Он также поддерживает развитие NFT и других цифровых активов.)
Платформы хранения
- IPFS — это одноранговый гипермедийный протокол, предназначенный для децентрализованного хранения медиаконтента. Поскольку медиафайл, связанный с NFT, не может храниться непосредственно в цепочке блоков, IPFS может хранить все эти данные.
- Filecoin — это децентрализованная сеть хранения, разработанная специально для хранения самой важной информации, такой как медиафайлы. Платформа хранения включает в себя все, что потребуется разработчику для начала работы с децентрализованным хранилищем для NFT. Зная о своих преимуществах, Truffle Suite также запустил шаблон разработки NFT с Filecoin Box.
- Pinata также является одной из популярных платформ для загрузки файлов и управления ими в IPFS. Он предоставляет безопасные и проверяемые файлы для NFT.
Стандарты NFT
- ERC-721
- ERC-1155
- FA2
- dGoods
- TRC-721
Front-end Frameworks
- React
- Angular
- Vue
В этой статье демонстрируется пример создания торговой площадки NFT с использованием цепочки блоков Flow и сети IPFS Pinata.
Как разработать NFT Marketplace с помощью IPFS и Flow?
Мы поделились примером создания контракта,выпуска токена, создания приложения для просмотра NFT, сделанных с помощью этого контракта, и создания торговой площадки для перемещения NFT другим пользователям.
Начнем с создания контракта и выпуска токена.
Инструменты настройки
Установите Flow CLI в вашу систему.
Существуют разные команды для установки CLI в зависимости от разных операционных систем.
Например, чтобы установить Flow CLI на macOS, используйте команду:
data-hren="https://storage.googleapis.com/flow-cli/install.ps1" rel= https://storage.googleapis.com/flow-cli/install.ps1') }data-hren="https://storage.googleapis.com/flow-cli/install.sh" rel=>https://storage.googleapis.com/flow-cli/install.sh)Файлы активов будут храниться в IPFS.
В этом примере мы собираемся использовать Pinata для хранения файлов. Вы можете зарегистрировать бесплатную учетную запись и получить ключ API здесь.
Также важно установить NodeJS и текстовый редактор, чтобы выделить код смарт-контракта Flow.
Второй шаг — создать каталог для проекта с помощью команды:
Инициализируйте новый потоковый проект и поместите его в этот каталог:
cd pinata-party
flow project init
Теперь откройте проект в редакторе кода и приступим к работе. Сначала создайте папку с именем cadence. Добавьте в эту папку еще одну папку с именем contracts . Наконец, создайте файл в папке контрактов с именем PinataPartyContract.cdc
Прежде чем двигаться дальше, важно указать на все, что мы делаем в отношении платформы блокчейна Flow.
Настройте файл для среды эмулятора, и тогда мы можем приступить к написанию контракта.
Нам нужно обновить объект контракта в flow.json, используя код:
contracts": {
"PinataPartyContract": "./cadence/contracts/PinataPartyContract.cdc"
}
Обновите объект развертывания в этом файле, используя приведенный ниже код:
deployments": {
"emulator": {
"emulator-account": ["PinataPartyContract"]
}
}
Это позволит Flow CLI использовать эмулятор для развертывания нашего контракта. Этот код также ссылается на учетную запись и контракт, которые мы собираемся написать в ближайшее время.
Контракты
Нам нужно создать контракты для выпуска NFT, связывания метаданных с NFT и обеспечения того, чтобы метаданные указывали на базовые активы, хранящиеся в IPFS.
Откройте PinataPartyContract.cdc и выполните следующий код:
pub contract PinataPartyContract {
pub resource NFT {
pub let id: UInt64
init(initID: UInt64) {
self.id = initID
}
}
}
Первый шаг — составить контракт.
Давайте начнем с определения PinataPartyContract и создадим внутри него ресурс. Ресурсы — это элементы, сохраненные в учетных записях пользователей, которые доступны через меры контроля доступа.
NFT должны быть идентифицируемыми, а свойство id позволяет идентифицировать токены.
Затем создается интерфейс ресурсов, чтобы определить, какие возможности доступны другим.
pub resource interface NFTReceiver {
pub fun deposit(token: @NFT, metadata: {String : String})
pub fun getIDs(): [UInt64]
pub fun idExists(id: UInt64): Bool
pub fun getMetadata(id: UInt64) : {String : String}
}
Поместите приведенный выше код под кодом ресурса NFT. Интерфейс ресурса NFTReceiver сообщает, что ресурс может вызывать следующие методы:
getIDs
idExists
deposit
getMetadata
Затем необходимо определить интерфейс сбора токенов. Рассматривайте его как кошелек, в котором хранятся NFT всех пользователей.
pub resource Collection: NFTReceiver {
pub var ownedNFTs: @{UInt64: NFT}
pub var metadataObjs: {UInt64: { String : String }}
init () {
self.ownedNFTs <- {}
self.metadataObjs = {}
}
pub fun withdraw(withdrawID: UInt64): @NFT {
let token <- self.ownedNFTs.remove(key: withdrawID)!
return <-token
}
pub fun deposit(token: @NFT, metadata: {String : String}) {
self.metadataObjs[token.id] = metadata
self.ownedNFTs[token.id] <-! token
}
pub fun idExists(id: UInt64): Bool {
return self.ownedNFTs[id] != nil
}
pub fun getIDs(): [UInt64] {
return self.ownedNFTs.keys
}
pub fun updateMetadata(id: UInt64, metadata: {String: String}) {
self.metadataObjs[id] = metadata
}
pub fun getMetadata(id: UInt64): {String : String} {
return self.metadataObjs[id]!
}
destroy() {
destroy self.ownedNFTs
}
}
Переменная ownedNFTs отслеживает все NFT, которыми пользователь может владеть от контактора. Переменная metadataObjs уникальна, поскольку мы расширяем функциональность контракта Flow NFT, чтобы хранить отображение метаданных для каждого NFT.
Она сопоставляет идентификатор токена с соответствующими метаданными, что означает, что идентификатор токена необходим, прежде чем мы сможем его установить. Переменные инициализируются, чтобы определить их в ресурсе внутри Flow.
Наконец, у нас будут все доступные функции, необходимые для ресурса коллекции NFT. Так же, как стандартный контракт NFT был расширен для включения отображения metadataObjs, мы расширим функцию депонирования по умолчанию, чтобы она принимала дополнительный параметр метаданных.
Это сделано для того, чтобы гарантировать, что только майнер токена может добавить метаданные к токену.
Мы ограничиваем первоначальное добавление метаданных выполнением майнинга, чтобы сохранить его конфиденциальность. Добавьте следующий код ниже ресурса Collection:
pub fun createEmptyCollection(): @Collection {
return <- create Collection()
}
pub resource NFTMinter {
pub var idCount: UInt64
init() {
self.idCount = 1
}
pub fun mintNFT(): @NFT {
var newNFT <- create NFT(initID: self.idCount)
self.idCount = self.idCount + 1 as UInt64
return <-newNFT
}
}
Во-первых, у нас будет функция для создания пустой коллекции NFT при вызове. Пользователь, взаимодействующий с контрактом, будет иметь место хранения, которое отображает определенный ресурс Collection.
После этого мы создадим еще один ресурс. Без него мы не сможем выпускать токены. NFTMinter включает в себя idCount, который увеличивается каждый раз, чтобы у нас не было дублирующихся идентификаторов для NFT. Он также содержит функцию для создания NFT.
Добавьте инициализатор основного контракта ниже ресурса NFTMinter:
init() {
self.account.save(<-self.createEmptyCollection(),to: /storage/NFTCollection)
self.account.link<&{NFTReceiver}>(/public/NFTReceiver,target:/storage/NFTCollection)
self.account.save(<-create NFTMinter(), to: /storage/NFTMinter)
}
Функция инициализатора вызывается только при развертывании контракта. Она выполняет три действия:
Создает пустую коллекцию для развертывателя коллекции, чтобы контракт-владелец мог создавать и владеть NFT из контракта.
Ресурс NFTMinter хранится в хранилище счета для создателя контракта. Это означает, что только создатель контракта может выпускать токены.
Ресурс Collection публикуется в публичном месте со ссылкой на интерфейс NFTReceiver, созданный в самом начале. Так мы сообщаем контракту, что любой может вызывать функции, определенные в NFTReceiver.
Когда контракт готов, давайте развернем его. Прежде чем развернуть его:
Протестируйте его на игровой площадке Flow Playground.
Перейдите на Flow Playground и нажмите на первый аккаунт в левой боковой панели.
Замените весь код на код контракта и нажмите кнопку Развернуть.
Если все прошло успешно, вы должны увидеть журнал в нижней части экрана:
16:48:55 Deployment Deployed Contract To: 0x01
Поскольку теперь настало время развернуть контракт на локально запущенном эмуляторе, выполните следующую команду:
<p class="in io ip iq ir lt lu dy">flow project start-emulator</p>Запустив эмулятор и настроив файл flow.json, можно развернуть контракт с помощью следующей команды:
<p class="in io ip iq ir lt lu dy">flow project deploy</p>Если все прошло успешно, вы должны увидеть результат, подобный этому:
Deploying 1 contracts for accounts: emulator-account
PinataPartyContract → 0xf8d6e0586b0a20c7
Теперь перейдем к выпуску NFT.
Minting NFTs
В этом разделе мы обсудим процесс выпуска NFT с помощью приложения и пользовательского интерфейса. Для получения демонстрации того, как метаданные работают с NFT на Flow, мы будем использовать командную строку и скрипты Cadence.
Создайте новую директорию в корне нашего проекта pinata-party и назовите ее «transactions». После создания папки создайте в ней новый файл с именем MintPinataParty.cdc.
У нас должен быть файл, на который мы будем ссылаться в метаданных, предлагаемых NFT. Файл загружается в IPFS через Pinata. В этом учебном пособии NFT сфокусированы на продаваемых видеороликах о том, как Pinata разбивается на вечеринках. В этой демонстрации мы загрузим видео ребенка, разбивающего Pinata на вечеринке по случаю дня рождения. Вы можете загрузить любой медиафайл и связать его с NFT.
После загрузки файла вам будет присвоен хэш IPFS. Скопируйте хэш, так как он будет использоваться в процессе выпуска. Теперь добавьте следующий код в файл MintPinataParty.cdc.
import PinataPartyContract from 0xf8d6e0586b0a20c7
transaction {
let receiverRef: &{PinataPartyContract.NFTReceiver}
let minterRef: &PinataPartyContract.NFTMinter
prepare(acct: AuthAccount) {
self.receiverRef=acct.getCapability<&{PinataPartyContract.NFTReceiver}>(/public/NFTReceiver)
.borrow()
?? panic("Could not borrow receiver reference")
self.minterRef = acct.borrow<&PinataPartyContract.NFTMinter>(from: /storage/NFTMinter)
?? panic("could not borrow minter reference")
}
execute {
let metadata : {String : String} = {
"name": "The Big Swing",
"swing_velocity": "29",
"swing_angle": "45",
"rating": "5",
"uri": "ipfs://QmRZdc3mAMXpv6Akz9Ekp1y4vDSjazTx2dCQRkxVy1yUj6"
}
let newNFT <- self.minterRef.mintNFT()
self.receiverRef.deposit(token: <-newNFT, metadata: metadata)
log("NFT Minted and deposited to Account 2's Collection")
}
}
Во-первых, мы определили две ссылочные переменные, minterRef и receiverRef. В этом сценарии мы одновременно являемся получателем и создателем NFT. Эти переменные ссылаются на ресурсы, созданные в контракте. Транзакция завершится неудачей, если лицо, выполняющее ее, не имеет доступа к ресурсу.
Приведенный выше контракт будет выпускать и депонировать НФТ. Теперь мы отправим транзакцию и зачислим NFT. Но перед этим нам нужно подготовить счет. Создайте закрытый ключ для подписи из командной строки в корневой папке проекта.
Выполните приведенную ниже команду:
Он предоставит вам открытый и закрытый ключи. Обязательно защитите свой закрытый ключ.
Закрытый ключ понадобится вам для подписания транзакции, который нужно вставить в наш файл flow.json. Также необходимо указать алгоритм подписания, и вот как должен выглядеть ваш объект счетов в файле flow.json:
<p style="text-align: left;">"accounts": {
"emulator-account": {
"address": "YOUR ACCOUNT ADDRESS",
"privateKey": "YOUR PRIVATE KEY",
"chain": "flow-emulator",
"sigAlgorithm": "ECDSA_P256",
"hashAlgorithm": "SHA3_256"
}
},
Если вы хотите хранить что-либо из этого проекта в удаленном git-репозитории или на Github, вам не следует включать закрытый ключ. Вам может понадобиться .gitignore всего flow.json. Хотя мы используем только локальный эмулятор, хорошо бы держать ключи под защитой.
Последнее, что нам нужно сделать, это проверить, что токен находится в нашем аккаунте, и получить метаданные. Чтобы проверить это, нам нужно написать простой сценарий и вызвать его из командной строки.
Создайте новую папку scripts в корне вашего проекта. Создайте внутри папки файл CheckTokenMetadata.cdc. Добавьте в этот файл следующий код:
<p style="text-align: left;">import PinataPartyContract from 0xf8d6e0586b0a20c7</p>
<p style="text-align: left;">pub fun main() : {String : String} {</p>
<p style="text-align: left;">let nftOwner = getAccount(0xf8d6e0586b0a20c7) // log("NFT Owner")</p>
<p style="text-align: left;">let capability = nftOwner.getCapability<&{PinataPartyContract.NFTReceiver}>(/public/NFTReceiver)</p>
<p style="text-align: left;">let receiverRef = capability.borrow()</p>
<p style="text-align: left;">?? panic("Could not borrow the receiver reference")</p>
<p style="text-align: left;">return</p>
<p style="text-align: left;">receiverRef.getMetadata(id: 1)</p>
<p style="text-align: left;">}</p>В этом сценарии мы импортируем контракт с развернутого адреса. Мы определяем главную функцию и определяем три переменные внутри нее:
- nftOwner
This account owns the NFT.
- capability
Capabilities are access-controlled. If a capability is not available to the address attempting to borrow it, the script gets failed. In this example, we borrow capabilities from the NFTReceiver resource.
- receiverRef
The variable takes our capability and states the script to borrow from the deployed contract.
Мы хотим убедиться, что адрес, о котором идет речь, получил NFT, который мы выпустили, а затем мы хотим просмотреть метаданные, связанные с токеном.
Запустите скрипт с помощью следующей команды и посмотрите, что мы получим:
<p class="in io ip iq ir lt lu dy"><span class="ce lv ko fe ls b cb lw lx s ly">flow scripts execute ./scripts/CheckTokenMetadata.cdc</span></p>Вы получите результат, подобный этому:
{“name”: “The Big Swing”, “swing_velocity”: “29”, “swing_angle”: “45”, “rating”: “5”, “uri”: “ipfs://QmRZdc3mAMXpv6Akz9Ekp1y4vDSjazTx2dCQRkxVy1yUj6“}Наконец, вы создали смарт-контракт Flow, создали токен, связали метаданные с токеном и сохранили базовые цифровые активы токена на IPFS.
Затем мы создадим внешнее приложение React, которое позволит вам отображать NFT, получая метаданные.
Отображение предметов коллекционирования NFT
Мы будем создавать простое приложение React, которое взаимодействует со смарт-контрактами Flow для проверки и получения NFT, принадлежащих пользователям.
Настройка React и зависимостей
Создайте приложение React в родительском каталоге pinata-party. Выполните следующую команду, чтобы создать приложение React:
<span class="ce lv ko fe ls b cb lw lx s ly">npx create-react-app pinata-party-frontend </span>Когда вы закончите установку, вы увидите новый каталог с именем pinata-party-frontend. Перейдите в этот каталог и установите зависимости. Для первой части настройки внешнего интерфейса запустите:
<p class="in io ip iq ir mq mr dy"><span class="ce ms ld fe mp b cb mt mu s mv">npm i @onflow/fcl @onflow/types
</span>
Мы будем хранить некоторые значения как глобальные переменные для нашего приложения и использовать переменные среды. В качестве реакции это означает создание файла .env и установку пар ключ-значение, в которых вам нужно добавить префикс REACT_APP.
Затем создайте файл конфигурации, который будет использоваться для взаимодействия с Flow JS SDK. Создайте файл config.js в каталоге src и добавьте следующий код:
<p class="in io ip iq ir mq mr dy"><span class="ce ms ld fe mp b cb mt mu s mv">import {config} from "@onflow/fcl"
config()
.put("accessNode.api", process.env.REACT_APP_ACCESS_NODE)
.put("challenge.handshake", process.env.REACT_APP_WALLET_DISCOVERY)
.put("0xProfile", process.env.REACT_APP_CONTRACT_PROFILE)</span>
Этот файл конфигурации просто помогает JS SDK работать с блокчейном Flow (или в данном случае с эмулятором). Чтобы сделать этот файл доступным во всем приложении, откройте index.js файл и добавьте эту строку:
class="ji jj fe jk b gc jl jm jn gf jo jp jq jr js jt ju jv jw jx jy jz ka kb kc kd ew ce">import "./config"Важно иметь функцию аутентификации в приложении, чтобы обеспечить безопасную передачу активов NFT. Нам нужен компонент аутентификации. Создайте файл AuthCluster.js в каталоге src. Добавьте в этот файл следующее:
import React, {useState, useEffect} from 'react'
import * as fcl from "@onflow/fcl"
const AuthCluster = () => {
const [user, setUser] = useState({loggedIn: null})
useEffect(() => fcl.currentUser().subscribe(setUser), [])
if (user.loggedIn) {
return (
<div>
<span>{user?.addr ?? "No Address"}</span>
<p style="text-align: left;"><button className="btn-primary" onClick={fcl.unauthenticate}>Log Out</button></p>
</div>
)
} else {
return (
<div>
<p style="text-align: left;"><button className="btn-primary"onClick={fcl.logIn}>Log In</button></p>
<p style="text-align: left;"><button className="btn-secondary" onClick={fcl.signUp}>Sign Up</button></p>
</div>
)
}
}
export default AuthClusterЧтобы добавить этот компонент в приложение, замените файл app.js следующим:
<p class="hh hi hj hk hl ln lo by"><span class="ec lp ka df lm b jp lq lr s ls">
import './App.css';
import AuthCluster from './AuthCluster';</span><span class="ec lp ka df lm b jp lt lu lv lw lx lr s ls">function App() {
return (
<div className="App">
<AuthCluster />
</div>
);
}</span><span class="ec lp ka df lm b jp lt lu lv lw lx lr s ls">export default App;</span>После добавления вышеуказанного кода вы увидите страницу с кнопкой регистрации при запуске приложения. Теперь пришло время создать возможность получать NFT для учетной записи и отображать их.
Получение NFT из FLOW
Чтобы отображать созданные нами NFT, необходимо взаимодействовать с блокчейном Flow. В этом руководстве мы должны иметь возможность общаться с эмулятором Flow.
Давайте создадим компонент, который позволяет получать данные и отображать данные NFT. Создайте файл TokenData.js в каталоге src и добавьте в него следующий код:
import React, { useState } from "react";
import * as fcl from "@onflow/fcl";
const TokenData = () => {
const [nftInfo, setNftInfo] = useState(null)
const fetchTokenData = async () => {
const encoded = await fcl
.send([
fcl.script`
import PinataPartyContract from 0xf8d6e0586b0a20c7
pub fun main() : {String : String} {
let nftOwner = getAccount(0xf8d6e0586b0a20c7)
<p style="text-align: left;">let capability = nftOwner.getCapability<&{PinataPartyContract.NFTReceiver}>(/public/NFTReceiver)
let receiverRef = capability.borrow()
?? panic("Could not borrow the receiver reference")
return receiverRef.getMetadata(id: 1)
}`
])
const decoded = await fcl.decode(encoded)
setNftInfo(decoded)
};
return (
<div className="token-data">
<div className="center">
<button className="btn-primary" onClick={fetchTokenData}>Fetch Token Data</button>
</div>
{
nftInfo &&
<div>
{
Object.keys(nftInfo).map(k => {
return (
<p>{k}: {nftInfo[k]}</p>
)
})
}
<p style="text-align: left;"><button onClick={()=>setNftInfo(null)} className="btn-secondary">Clear Token Info</button></p>
</div>
}
</div>
);
};
export default TokenData;В этом файле мы создаем компонент с кнопкой для получения данных токена. Мы также создали кнопку для очистки данных токена. При нажатии кнопки выборки вызывается функция fetchTokenData. Функция использует Flow JS SDK для запуска скрипта, который мы выполнили из командной строки. Получение результатов выполнения и установка результатов в переменную состояния nftInfo. Если переменная существует, пары ключ-значение отображаются из метаданных NFT на экране и кнопки для очистки данных.
Получение медиа из IPFS
Поскольку мы уже зарегистрировались в учетной записи Pinata и добавили видеофайл в IPFS через интерфейс загрузки Pinata, вы попадаете на шлюз Pinata IPFS, где содержимое IPFS отображается при нажатии на хэш в проводнике контактов.
В файле TokenData.js добавьте способ отображения видеофайла, полученного из IPFS. Обновите файл, чтобы он выглядел так:
import React, { useState } from "react";
import * as fcl from "@onflow/fcl";
const TokenData = () => {
const [nftInfo, setNftInfo] = useState(null)
const fetchTokenData = async () => {
const encoded = await fcl
.send([
fcl.script`
import PinataPartyContract from 0xf8d6e0586b0a20c7
pub fun main() : {String : String} {
let nftOwner = getAccount(0xf8d6e0586b0a20c7)
<p style="text-align: left;">let capability = nftOwner.getCapability<&{PinataPartyContract.NFTReceiver}>(/public/NFTReceiver)</p>
let receiverRef = capability.borrow()
?? panic("Could not borrow the receiver reference")
return receiverRef.getMetadata(id: 1)
}
])
const decoded = await fcl.decode(encoded)
setNftInfo(decoded)
};
return (
<div className="token-data">
<div className="center">
<button className="btn-primary" onClick={fetchTokenData}>Fetch Token Data</button>
</div>
{
nftInfo &&
<div>
{
Object.keys(nftInfo).map(k => {
return (
<p>{k}: {nftInfo[k]}</p>
)
})
}
<div className="center video">
<video id="nft-video" canplaythrough controls width="85%">
<p style="text-align: left;"><source src={`https://ipfs.io/ipfs/${nftInfo["uri"].split("://")[1]}`} type="video/mp4" /></p>
</video>
<div>
<p style="text-align: left;"><button onClick={() => setNftInfo(null)} className="btn-secondary">Clear Token Info</button></p>
</div>
</div>
</div>
}
</div>
);
};
export default TokenData;Элемент видео с источником указывает на файл в IPFS. URI, созданный с помощью NFT, выглядит как ipfs: // Qm…
Мы сделали это так, потому что настольный клиент IPFS позволяет нажимать и открывать ссылки.
Теперь NFT станет настоящим живым цифровым активом на блокчейне.
Теперь мы включим передачу NFT.
Перенос NFT
Прежде всего, нам нужно создать контракты на создание торговой площадки. Контракты будут заключаться на:
- Механизм оплаты взаимозаменяемых токенов
- Настройки подачи токенов
- Возможности передачи токенов
Давайте создадим взаимозаменяемый токен-контракт, который будет использоваться для платежей при покупке NFT.
Мы создадим взаимозаменяемый контракт токена, определив пустой контракт:
class="hh hi hj hk hl ln lo by"><span class="ec lp kb df lm b jp lq lr s ls">pub contract PinnieToken {</span><span class="ec lp kb df lm b jp lt lu lv lw lx lr s ls">} </span>Переменные публикации токена, связанные с ресурсами токена и провайдера, необходимо добавить в контракт.
pub var totalSupply: UFix64
pub var tokenName: String
pub resource interface Provider {
pub fun withdraw(amount: UFix64): @Vault {
post {
result.balance == UFix64(amount):
"Withdrawal amount must be the same as the balance of the withdrawn Vault"
}
}
}
Добавьте вышеуказанный контракт в пустой контракт.
Интерфейс ресурса под названием Provider определяет общедоступную функцию, но владелец учетной записи может только вызывать ее. Затем мы определим еще два интерфейса общедоступных ресурсов:
pub resource interface Receiver {
pub fun deposit(from: @Vault)
}
pub resource interface Balance {
pub var balance: UFix64
}
Вышеупомянутые интерфейсы располагаются непосредственно под интерфейсом ресурсов провайдера. Интерфейс Receiver включает функцию, которую может выполнить любой. Это гарантирует, что депозиты на счет могут выполняться до тех пор, пока получатель инициализирует хранилище для обработки токенов, созданных в рамках контракта. Ресурс Balance возвращает баланс нового токена для любой предоставленной учетной записи.
Давайте создадим ресурс Vault и добавим следующий код под ресурсом Balance:
pub resource Vault: Provider, Receiver, Balance {
pub var balance: UFix64
init(balance: UFix64) {
self.balance = balance
}
pub fun withdraw(amount: UFix64): @Vault {
self.balance = self.balance - amount
return <-create Vault(balance: amount)
}
pub fun deposit(from: @Vault) {
self.balance = self.balance + from.balance
destroy from
}
}
Добавьте следующую функцию в интерфейс хранилища:
pub fun createEmptyVault(): @Vault {
return <-create Vault(balance: 0.0)
}
Как следует из названия, функция создает пустой ресурс Vault для учетной записи. Баланс равен 0.
Следовательно, теперь нам нужно настроить возможность минтинга. Добавьте следующий код под функцией createEmptyVault:
pub resource VaultMinter {
style="text-align: left;">pub fun mintTokens(amount: UFix64, recipient: Capability<&AnyResource{Receiver}>)
{
let recipientRef = recipient.borrow()
?? panic("Could not borrow a receiver reference to the vault")
PinnieToken.totalSupply = PinnieToken.totalSupply + UFix64(amount)
recipientRef.deposit(from: <-create Vault(balance: amount))
}
}
Ресурс VaultMinter является общедоступным, но доступен только владельцу контрактной учетной записи.
Ресурс VaultMinter включает в себя только одну функцию: mintTokens, для которой требуется сумма, которую нужно монетизировать, и получатель. Вновь отчеканенные токены могут быть депонированы в эту учетную запись, если у получателя будет храниться ресурс Vault.
Переменную totalSupply необходимо обновлять при чеканке токенов. Следовательно, отчеканенная сумма добавляется к предыдущему запасу для получения нового запаса.
Теперь нам нужно инициализировать контракт и добавить следующий код после ресурса VaultMinter:
init() {
self.totalSupply = 30.0
self.tokenName = "Pinnie"
let vault <- create Vault(balance: self.totalSupply)
self.account.save(<-vault, to: /storage/MainVault)
self.account.save(<-create VaultMinter(), to: /storage/MainMinter)
style="text-align: left;">self.account.link<&VaultMinter>(/private/Minter, target: /storage/MainMinter)
}
При заключении контракта важно установить общий объем поставки. В этом примере мы инициализировали контракт с поставкой 30 и установили имя токена как «Пинни».
Развертывание и выпуск токенов
Обновите файл flow.json в проекте, чтобы развернуть новый контракт. Убедитесь, что файл flow.json ссылается на новый контракт и содержит ссылку на ключ учетной записи эмулятора:
{
"emulators": {
"default": {
"port": 3569,
"serviceAccount": "emulator-account"
}
},
"contracts": {
"PinataPartyContract": "./cadence/contracts/PinataPartyContract.cdc",
"PinnieToken": "./cadence/contracts/PinnieToken.cdc"
},
"networks": {
"emulator": {
"host": "127.0.0.1:3569",
"chain": "flow-emulator"
}
},
"accounts": {
"emulator-account": {
"address": "f8d6e0586b0a20c7",
"keys": "e5ca2b0946358223f0555206144fe4d74e65cbd58b0933c5232ce195b9058cdd"
}
},
"deployments": {
"emulator": {
"emulator-account": ["PinataPartyContract", "PinnieToken"]
}
}
}
В другом окне терминала в каталоге проекта стороны пината запустите развертывание проекта потока. Теперь давайте протестируем функцию чеканки. Мы создадим транзакцию, которая позволит нам создавать токены Pinnie. Но сначала нам нужно обновить файл flow.json.
Измените json под учетной записью эмулятора:
style="text-align: left;">"emulator-account": {
"address": "f8d6e0586b0a20c7",
"privateKey": "e5ca2b0946358223f0555206144fe4d74e65cbd58b0933c5232ce195b9058cdd",
"sigAlgorithm": "ECDSA_P256",
"hashAlgorithm": "SHA3_256",
"chain": "flow-emulator"
},
Поле ключа становится полем privateKey, и мы добавляем свойства, включая sigAlgorithm, цепочку и hashAlgorithm.
Разработка торговой площадки NFT
Прежде чем приступить к работе над внешним интерфейсом торговой площадки, у нас должен быть контракт на создание и управление торговой площадкой.
В папке cadence / контракты создайте новый файл с именем MarketplaceContract.cdc.
import PinataPartyContract from 0xf8d6e0586b0a20c7
import PinnieToken from 0xf8d6e0586b0a20c7
pub contract MarketplaceContract {
pub event ForSale(id: UInt64, price: UFix64)
pub event PriceChanged(id: UInt64, newPrice: UFix64)
pub event TokenPurchased(id: UInt64, price: UFix64)
pub event SaleWithdrawn(id: UInt64)
pub resource interface SalePublic {
style="text-align: left;">pub fun purchase(tokenID: UInt64, recipient: &AnyResource{PinataPartyContract.NFTReceiver}, buyTokens: @PinnieToken.Vault)
pub fun idPrice(tokenID: UInt64): UFix64?
pub fun getIDs(): [UInt64]
}
}
Нам нужно импортировать как контракт NFT, так и контракт заменяемого токена. В определении контракта мы определили четыре события:
- ForSale: продажа NFT
- PriceChanged: изменение цены на NFT.
- TokenPurchased: при покупке NFT
- SaleWithdrawn: когда NFT удаляются с торговой площадки.
Мы добавили интерфейс ресурса под названием SalePublic под эмиттерами событий. Интерфейс должен быть общедоступным для всех, а не только для владельца контракта.
Нам нужно добавить ресурс SaleCollection под интерфейсом SalePublic. Мы определили несколько переменных в этом ресурсе. Например, отображение токенов для продажи, отображение цен на каждый токен для продажи и защищенная переменная, доступная только владельцу контракта, под названием ownerVault.
Нам нужно инициализировать переменные при их определении на ресурсе. Это выполняется в функции init и инициализируется ресурсом хранилища владельца и пустыми значениями.
Затем важно определить функции для управления действиями торговой площадки NFT. Функции:
- listForSale
- changePrice
- withdraw
- idPrice
- purchase
- destroy
- getIDs
Как упоминалось выше, три из этих функций общедоступны, это означает, что listForSale, remove, destroy и changePrice доступны только для перечисленных владельцев NFT. Например, changePrice не доступен публично, потому что мы не хотим, чтобы кто-либо менял цену NFT.
Последняя часть рыночного контракта — это функция CreateSaleCollection. Это позволяет добавить коллекцию в качестве ресурса к учетной записи. После написания этого контракта мы развернем его с учетной записью эмулятора. Выполните следующую команду из корня вашего проекта:
Наконец, он развернет рыночный контракт и позволит нам использовать его во внешнем приложении.
Как только это будет сделано, нам нужно поработать над интерфейсом и подключить эти контракты с помощью инструмента Flow CLI.
Если вы хотите создать собственную торговую площадку NFT, проконсультируйтесь с нашими экспертами по разработке NFT, которые помогут вам от консультаций до разработки и запуска платформы торговой площадки.
Поддержите блог, перечислив небольшие чаевые
Если у вас нет кошелька MetaMask, вы можете получить его здесь
Latest News

Tips & Tricks
October 28, 2020
How to create NFT item
The NFT can be associated with a particular digital or physical asset such as images, art, music, and sport highlights and may confer licensing rights….

Tips & Tricks
October 28, 2020
How to sell NFT item
NFTs function like cryptographic tokens, but unlike cryptocurrencies such as Bitcoin or Ethereum, NFTs are not mutually interchangeable…

Tips & Tricks
October 28, 2020
Where to sell NFT item
The ownership of an NFT as defined by the blockchain has no inherent legal meaning, and does not necessarily grant copyright, intellectual property…
Main Features
- Fully Responsive, Compatible with all screen sizes.
- Major Browsers compatibility
- Clean and Modern Design
- W3C Valide Code.
- Bootstrap 4 Based.
- Font Awesome Icons
- Well Documented
- Easy Customization
- Well Commented Code.
- Custom Icons
Support
We give support for all our items. We try to answer all questions within 24 hours in weekdays. Support requests receive during weekends or public holidays will be processed on next Monday or the next business day. if you have any questions, Please feel free to contact us.
Images in the previews
fonts
- Oswald
- Karla
- fontawesome
Note that: All images are for preview purposes only and are not included in the purchase
-
Millions of creative assets, unlimited downloads.
One low cost subscription. Cancel any time.
-
Effortless design and video.
Made online by you.Smart templates ready for any skill level.
Find the Best HTML Templates for NFT Websites on ThemeForest
You can choose from dozens of NFT templates currently available on ThemeForest, an online marketplace dedicated to providing high-quality templates for a multitude of projects.


The marketplace is actually a part of the Envato Market, where you can find a plethora of resources for all sorts of creative projects, including everything from website templates to audio clips to vector art.
12 Best HTML Templates for NFT Websites in 2022
If you’ve come here looking for an NFT template for your website, your patience will be rewarded. What follows is a collection of some of our favorite NFT HTML templates you can put to work immediately.
Gigaland — NFT Marketplace Template
Gigaland is a responsive HTML template that’s perfect for creating an NFT marketplace or for selling other digital items. It comes preloaded with numerous styles you can use immediately and it’s built on Bootstrap 5, uses CSS3 Animation, and more to create stunning effects.
Should you choose this template, you can expect to receive:
- Over 150 different page templates (20 of which are homepage designs)
- 4 different color schemes
- Responsive design and layouts
- Animations on scrolling
- Lifetime of updates
Gigaland Live Demo


SaaSio — One Page SaaS NFT HTML Template
Next up is SaaSio, which is a one-page HTML template that can be used for any software-as-service product website, including NFTs. It’s a multipurpose template that works for agencies, startups, and service-based companies but can also be leveraged for NFT marketplaces.
A few features you get right out of the box include:
- More than 82 different homepage designs
- Built on Bootstrap 4
- Multiple demos for multiple purposes
SaaSio Live Demo


Nuron — NFT Marketplace HTML Template
Another option is Nuron, which is a full HTML template designed with NFT marketplaces in mind. And though NFTs is the intention here, this template can be used for any kind of digital marketplaces including other crypto-collectibles, digital art, and DeFi websites.
A few standout features here include:
- Built on Bootstrap 5 and SASS
- Light and dark options
Nuron Live Demo


Raroin — NFT Marketplace HTML Template
Or, perhaps Rarion is more your style? This NFT HTML template is a great choice for NFT marketplaces and includes the sort of creative design to back up such a claim. You can use it to sell any sort of digital goods from NFTs to virtual items.
Features you’ll want to be aware of include:
- 6 different landing page designs
- Multiple secondary pages
- Built on Bootstrap 5
- A modern design and overall aesthetic
- Remixicon icon sets included
- Multiple color palettes and components
Raroin Live Demo


Vie — Creative Agency NFT Template
There’s also the Vie HTML template, which is another multipurpose option that can be used for agencies, business startups, as well as digital online stores – including NFT websites. It comes with numerous demos and a responsive design that looks good on any device.
Some features to be aware of include:
- Built on Bootstrap
- Comes with a PHP contact form
- Font Awesome Icons
- Well-commented, documented and includes free updates.
Vie Live Demo


Unitok — NFT Marketplace HTML Template
Still another option is Unitok. This HTML template is geared toward those wishing to create an NFT marketplace. It comes with an overall creative design that suits the NFT market well. And it’s built on Bootstrap 4 so you know it’ll be stable and reliable. Other features to note include:
- Over 20 different page designs
- Straightforward customization options
- Stylus and JS files included
Unitok Live Demo


Axies — NFT Marketplace HTML Template
Another option is the Axies template, which offers the front-end HTML interface for an NFT store. To be clear, this does not include back-end support. However, it is still a great option for those looking for an NFT-specific website design. It comes with:
- 8 different homepage styles
Axies Live Demo


EnftyMart — NFT Marketplace HTML Template
Or, you may wish to consider EnftyMart, an HTML template designed for NFT marketplaces, specifically. It can be used for selling crypto-collectibles and other digital assets as well. And it’s built on Bootstrap 5 with Vanilla JS and SASS, so it’s quite stable and well-coded and commented.
Features you should definitely know about include:
- Light and dark mode
- A responsive and flexible design
- 3 homepage designs
- Over 29 different inner page designs
- An auction countdown timer
- 6 months of free support
EnftyMart Live Demo


Ethoz — NFT Website Template
And then there’s Ethoz, another NFT website HTML template that you can use for selling digital assets of any type. This one is built on HTML5, CSS3, and Bootstrap 5 + SASS and it promises a modern design and top-tier user experience.
A few specific features that really stand out include:
- 6 homepage designs
- Over 20 different inner page designs
- Numerous demos to choose from
- Offers a modern and trendy-looking layout design
Ethoz Live Demo


Monteno — NFT Portfolio HTML Template
Another consideration would have to be the Monteno HTML template. This one is designed for portfolios, specifically NFT portfolios, and works perfectly for displaying all sorts of crypto art, digital art, collectibles, and NFTs. Important features to be aware of include:
- Built with HTML 5 and CSS3
- Includes unlimited colors
- Boxed and wide layout options
- Ajax contact form included
- Parallax effects on scrolling
Monteno Live Demo


Cybox — NFT Collection HTML Template
We’d be remiss if we didn’t include Cybox on our list. This NFT portfolio template is another great way to display crypto and NFT art in a portfolio as well as for sale in an auction. You can easily use this template to create your own marketplace. A few features to know about include:
- Built on HTML5 and CSS3
- Easy customization options
- Supports unlimited colors
- Comes with a boxed and wide layout
- Includes an Ajax contact form
- Parallax effects on scrolling
Cybox Live Demo


Cryptoki — HTML Template for NFT and Digital Marketplaces
Last on our list here is the Cryptoki HTML template. This one can work well for creating an NFT marketplace or even for a shop just for your digital goods. With it you can display numerous versions of products, accept bids, allow authors to create profiles, and more.
Notable features include:
- Light code that’s well-commented
- Super simple customization options
- Dark and light modes included
- NFT-specific homepage design
- Supports up to 4 different item versions
- Multiple artworks and bid versions
Once you select a stellar NFT template, however, you still need to actually build your website. Luckily, we’ve got you covered in that regard, too.
Cryptoki Live Demo


5 Tips to Build a Better NFT Website
With your freshly minted NFT template in hand, you can get to building your new website. What follows are our five top tips for building a better NFT website.
Pick a Niche
Though it’s tempting to be a generalist, picking a niche is always a good idea – no matter the broad subject of your website. So when approaching the creation of an NFT website, you should do the same. That is, you should narrow down the types of NFTs you feature on your website. Or, you could aim to keep what’s featured on your site thematically consistent.
No matter what niche you decide on, keep your focus specific and stick with it.
Consider Your Branding
Another way to boost the effectiveness of your NFT website is to pay mind to your overall branding. No matter the template you select, make sure you customize it to suit your brand’s colors, fonts, and overall style.
This extends to your website’s content as well. Make sure any content you include maintains a consistent voice and overall tone that’s in keeping with your target audience.
Parallax Scrolling is Your Friend
Displaying an NFT gallery often means having content that loads dynamically on your website. Most often, this occurs when a site visitor scrolls down the website page. And this is accommodated through the use of parallax scrolling. Many of the templates we’ve included here support parallax scrolling, so it’s unlikely you’d need to custom-code this feature yourself.
Parallax scrolling can make for a more interactive, faster-loading, and overall more pleasant experience for site visitors as they browse through larger catalogs of NFTs.
Optimize Navigation and Search
When creating an NFT website, you also need to pay careful attention to how the navigation and site search is set up. If you’re going to be holding auctions or selling NFTs from this site, you need to make it as easy as possible for visitors to find what they’re looking for.
Invest in Top-Notch Security
Lastly, ensuring your website is secure is a must, too, especially if you’ll be collecting personal information from site visitors. Using a secure shopping cart system is a good start. Having encryption activated on your web hosting is another positive step. You should also make it a habit to conduct regular security checks, update passwords, and make updates to prevent potential security breaches.
Create Your Own NFT Website Today!
Hopefully you now have a better idea of how to go about creating an NFT website. And while you will need to populate it with content, you don’t have to go it alone. By using an HTML template with a NFT-inspired design, you can save a lot of time and get your website up and running quickly and easily.
And since you can find plenty of HTML templates to choose from on ThemeForest, the process has never been simpler. So why not dive in and start making your future NFT website right now?
More Crypto & NFT Template Collections and Freebies!
Did you find this post useful?

Freelance Writer
Brenda Barron is an instructor for Tuts+ specializing in business and web design topics. She also writes and edits for a variety of other businesses across many subjects including small business, WordPress, and marketing.
She holds a BA in English and has over a decade of experience crafting blog posts, articles, white papers, and more for clients across many industries. When not writing, you can find her spending time with family, singing, playing piano, and painting.
You can learn more about her at The Digital Inkwell.
Project setup
To get started, we’ll create a new Next.js app. To do so, open your terminal. Create or change into a new empty directory and run the following command:
npx create-next-app nft-marketplaceEnter fullscreen mode
Exit fullscreen mode
Next, change into the new directory and install the dependencies using a package manager like npm, yarn, or pnpm:
nft-marketplace
npm ethers hardhat @nomiclabs/hardhat-waffle
ethereum-waffle chai @nomiclabs/hardhat-ethers
web3modal @openzeppelin/contracts ipfs-http-client
axios
Enter fullscreen mode
Exit fullscreen mode
Setting up Tailwind CSS
We’ll be using Tailwind CSS for styling, we we will set that up in this step.
Tailwind is a utility-first CSS framework that makes it easy to add styling and create good looking websites without a lot of work.
Next, install the Tailwind dependencies:
npm tailwindcss@latest postcss@latest autoprefixer@latestEnter fullscreen mode
Exit fullscreen mode
Next, we will create the configuration files needed for Tailwind to work with Next.js (tailwind.config.js and postcss.config.js) by running the following command:
npx tailwindcss init Enter fullscreen mode
Exit fullscreen mode
Next, configure your template content paths in tailwind.config.js:
/* tailwind.config.js */ Enter fullscreen mode
Exit fullscreen mode
Finally, delete the code in styles/globals.css and update it with the following:
Enter fullscreen mode
Exit fullscreen mode
Configuring Hardhat
Next, initialize a new Hardhat development environment from the root of your project:
npx hardhat
? What you want to ? Create a basic sample project
? Hardhat project root: <Choose default path>
Enter fullscreen mode
Exit fullscreen mode
If you get an error referencing your README.md, delete README.md and run npx hardhat again.
Now you should see the following files and folders created for you in your root directory:
hardhat.config.js — The entirety of your Hardhat setup (i.e. your config, plugins, and custom tasks) is contained in this file.
scripts — A folder containing a script named sample-script.js that will deploy your smart contract when executed
test — A folder containing an example testing script
contracts — A folder holding an example Solidity smart contract
Next, update the configuration at hardhat.config.js with the following:
View the gist here
/* hardhat.config.js */ // unused configuration commented out for now Enter fullscreen mode
Exit fullscreen mode
In this configuration, we’ve configured the local Hardhat development environment as well as the Mumbai testnet (commented out for now).
You can read more about both Matic networks here.
Smart Contract
Next, we’ll create our smart contract!
In this file I’ll do my best to comment within the code everything that is going on.
Create a new file in the contracts directory named NFTMarketplace.sol. Here, add the following code:
View the gist here
// SPDX-License-Identifier: MIT /* Updates the listing price of the contract */ "Only marketplace owner can update listing price." /* Returns the listing price of the contract */ /* Mints a token and lists it in the marketplace */ "Price must be at least 1 wei" "Price must be equal to listing price" /* allows someone to resell a token they have purchased */ "Only item owner can perform this operation" "Price must be equal to listing price" /* Creates the sale of a marketplace item */ /* Transfers ownership of the item, as well as funds between parties */ "Please submit the asking price in order to complete the purchase" /* Returns all unsold market items */ Enter fullscreen mode
Exit fullscreen mode
In this contract we are inheriting from the ERC721 standard implemented by OpenZepplin
Now the smart contract code and environment is complete and we can try testing it out.
To do so, we can create a local test to run through much of the functionality, like minting a token, putting it up for sale, selling it to a user, and querying for tokens.
To create the test, open test/sample-test.js and update it with the following code:
View the gist here
/* test/sample-test.js */ Should create and execute market sales /* deploy the marketplace */ /* create two tokens */ /* resell a token */ /* query for and return the unsold items */ Enter fullscreen mode
Exit fullscreen mode
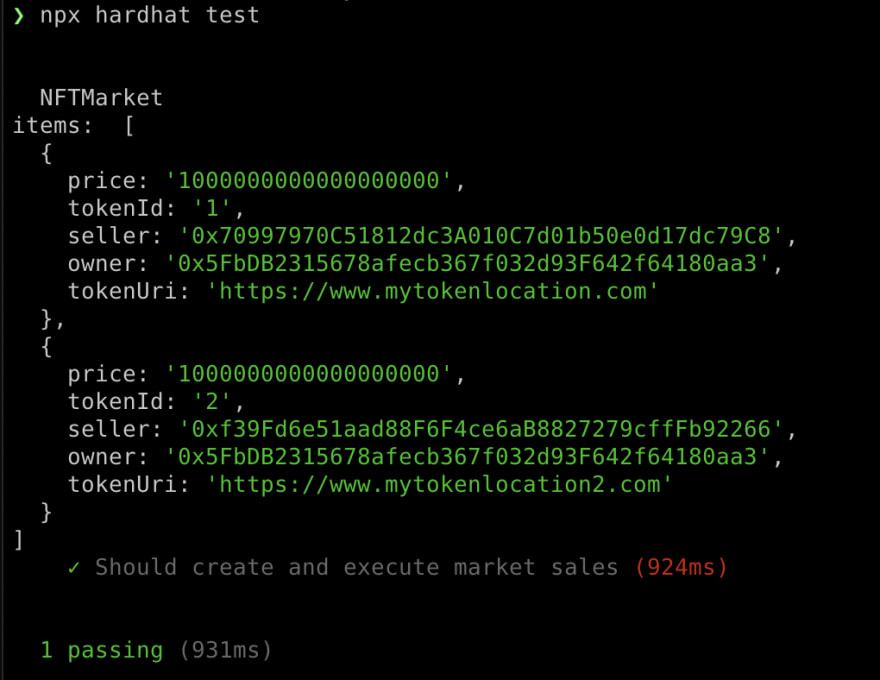
Next, run the test from your command line:
npx hardhat Enter fullscreen mode
Exit fullscreen mode
If the test runs successfully, it should log out an array containing the two marketplace items.