
I got an error when visiting opensea.io/assets/age-of-rust.
Ray ID: 775f8de93cbbbbec
Data center: fra07
In this Zero to Hero series, you’ll find a set of tutorials that will cover every aspect of a non-fungible token (NFT) smart contract.
You’ll start by minting an NFT using a pre-deployed contract and by the end you’ll end up building a fully-fledged NFT smart contract that supports every extension.
- Project Overview
- Overview
- Lynxee NFT Collection
- Install
- IPFS test collection
- Structure
- Endpoints
- Test deploy on prod
- NFT Market Reference Implementation
- TODO / DONE
- Working
- 🚨🚨🚨 End of Warning 🚨🚨🚨
- Detailed Installation / Quickstart
- Guests Account (key and tx gas sponsorship)
- Background
- NEAR Config
- Test Utils
- Using the NEAR Config in your app
- React 17, Parcel with useContext and useReducer
- Usage in Components
- Prefixing store and Provider
- Performance and memo
- Делаем смарт-контракт
- Как было
- Как стало
- Step 2. Writing the Mint Function Struct
- Add this topic to your repo
- Some General Tips About Solana Development
- Prep work
- Делаем фронтэнд
- Improve this page
- Next steps
- Here are 109 public repositories matching this topic.
- Добавляем NFT
- Fork me on Github
- In this how-to, you’ll learn how to mint an NFT on Solana by writing a Rust smart contract and using Metaplex’s Token Metadata Program
- Prerequisites
- Step 3. The Mint Function 🪙
- Step 4. Calling the Mint Function
- Step 1. Import the Dependencies
Project Overview
The tools we’ll be using for this:
View desktop website


The only aim in Rust is to survive. Everything wants you to die — the island’s wildlife and other inhabitants, the environment, other survivors. Do whatever it takes to last another night.
Visit the Store Page
Most popular community and official content for the past week.
View mobile website
Overview
These are the steps that will bring you from Zero to Hero in no time! 💪
19 out. 2021 às 8:39
Заработок реальных денег в раст.
Доброго времени суток. Приглашаю вас на открытие уникального и единственного в мире сервера Rust.
NFT RUST-это сервер Rust на котором мы реализовали мечту многих геймеров: играть в игру и зарабатывать на этом! Донат магазин — собственность всех игроков. Контроль над донат магазином больше не принадлежит администрации сервера. Мы создали сервер на котором каждый пользователь сможет сконвертировать свои игровые ресурсы в NFT токены и выставить их на биржу atomichub за любую стоимость, в тоже время пользователи для которых донат это норма смогут приобрести NFT токены и сконвертировать их в необходимые игровые ресурсы.
Классический сервер с рейтами х1 без ограничения игроков в группе. Античит система.
Запуск сервера 22.10.21 в 19:00 по МСК
Доброго времени суток. Кто-то уже знает, кто-то ещё нет. Но началась эра NFT. В том числе NFT игр. Смысл NFT игр в том, что бы зарабатывать играя в них. Но не всё не так просто. Тяжело найти игру с бесплатным входом или окупаемостью и выходом в плюс. Есть куча каналов посвящённых этой теме. Но как показывает опыт, вершки можно снять с игр о которых ещё мало кто знает.В своей статье хочу рассказать об одной из такой игр. Rusty NFT это метавселенная на базе популярной компьютерной игры Rust «играй, чтобы заработать», разработанная на блокчейне WAX.Множество видов добычи NFT совмещенные с рейдами в реальном времени и даже майнинг криптовалюты WAX на собственной внутри игровой майнинг ферме.Чтобы присоединится к проекту нужно иметь только клиент игры RUST, дополнительные вложения не требуются.Проект очень перспективный потому что NFT с клиентом, а не в браузере ещё нет. И я уверена проект порвёт рынок.К тому же регистрируясь сейчас вы попадаете в белый список АирДропов то есть получаете возможность бесплатно получать NFT

Игра — не что иное, как Age of Rust, построенная на экосистеме Enjin и способная превзойти все ожидания.
Age of Rust основан на футуристической стороне мира 45-го века, где все выходит из-под контроля, а мошеннические машины захватывают власть и развиваются в постапокалиптической атмосфере.
Поэтому механика скрытности, боя и головоломок — это инструменты, которыми вам придется овладеть, чтобы выжить в этой однопользовательской приключенческой игре от первого лица.
Благодаря тому, что Enjin поддерживает NFT с поддержкой более 800 тысяч долларов, использование является ключевым, обнаружение, исследование и решение головоломок вознаградят вас крипто-призами и ценными NFT, которые могут помочь вам прогрессировать.
Поскольку головоломки являются главной особенностью игры, вам придется научиться их решать, чтобы продвигаться вперед и получать вознаграждение.
Вот три типа головоломок, которые вы найдете во вселенной Age of Rust:
Игра выйдет где-то в 2022 году с отличной графикой и захватывающей атмосферой. Сочетая криптографические награды, мы рады и готовы добавить Age of Rust в нашу коллекцию игр.
Следите за Cryptoeconomics в социальных сетях!
ImageGenerator struct is used to generate the NFTs and respective metadata.
Attributes for the ImageGenerator struct:
Enum to distinguish between the Ethereum and Solana networks
Сейчас регулярно выходят анонсы про NFT-metaverse-блокчейн-игры, которые привлекали инвестиции в миллионы долларов по оценке в миллиарды, но при изучении проектов там оказываются либо плашки Coming Soon, либо продажа JPG-картинок на аукционах NFT-токенов, либо централизованные проекты с гомеопатическими дозами блокчейна. Перед тем, как окрестить это всё пузырем хайпа, я решил разобраться в технологическом стеке самостоятельно и сделать свою блокчейн-игру с NFT, потратив минимум ресурсов. Читайте под катом как у меня это получилось всего за 2 дня, а также покупайте мои NFT (нет).
Главные критерии создаваемый игры для меня были такие:
Проблемы, которые надо было решить:
Делать свой прием платежей не пришлось, ведь в блокчейне каждый аккаунт автоматически является кошельком. Если игру целиком засунуть в смарт-контракт, то она получится бездоверительной, так как не требует сервера/бекэнда и следовательно не подразумевает наличия центра доверия. Нужно лишь доверять коду. Игроки отправляют все свои действия в смарт-контракт, тот их обрабатывает и в конце принимает решение, кто выиграл, а потом автоматически выплачивает приз.
Смарт-контракт (или децентрализованное приложение, dApp) — это некая автономная неизменяемая сущность (микросервис), которая работает в распределенной сети (блокчейне) и запускается в контейнерах на серверах валидаторов. Валидаторы финансово заинтересованы вести себя правильно и оставаться доступными. Таким образом пользователи игры могут довериться, что код сработает предсказуемым образом, а его автор не сможет сбежать с деньгами, выключив сервера.
На блокчейнах «первой волны» выполнять транзакции было довольно дорого, но в последние годы появилось немало решений с крайне дешевыми транзакциями, что-то вроде $0.001 за “ход” с временем подтверждения в 1 секунду. RTS или шутеры тут конечно, не построишь, но как минимум настольные и логические игры уже выглядят пригодными. Также использование новыми блокчейнами Wasm в качестве виртуальной машины позволяет нам не изобретать велосипед свою собственную игровую механику, а использовать что-то написанное раньше и выложенное в Open Source.
Я решил начать с обычной игры в шашки, по максимуму используя чужой готовый код. Открыл git, запустил поиск и взял первые ссылки из выдачи: готовый код для логики игры (rusty-checkers) и JS UI для фронтенда (checkers).

Take the challenge and finish the race first!
How to start the game? Sign in and choose a type of the race: group or pairChoose your driving style and get ready for the race
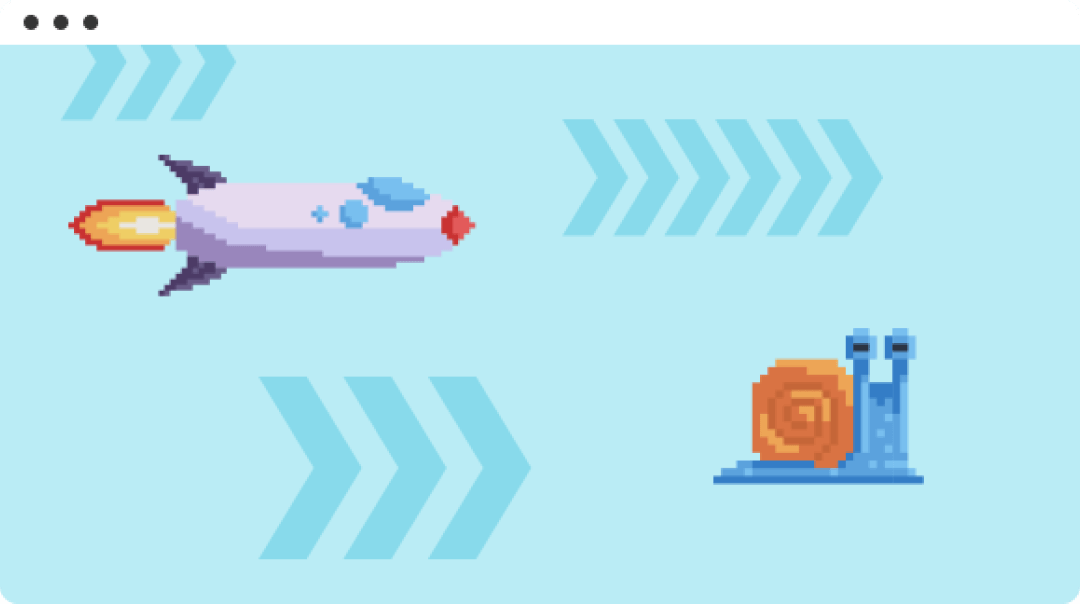
GameplayThe Rust Cup Game is an indirectly controlled racing rally where players compete on tracks with different difficulty. To win, you need to choose your driving style, driver and prepare for the weather conditions on the track.
A player can choose different types of race:
DuelSacrifice everything but overtake your opponent. Compete in a doubles race and show what you can do. Check it out
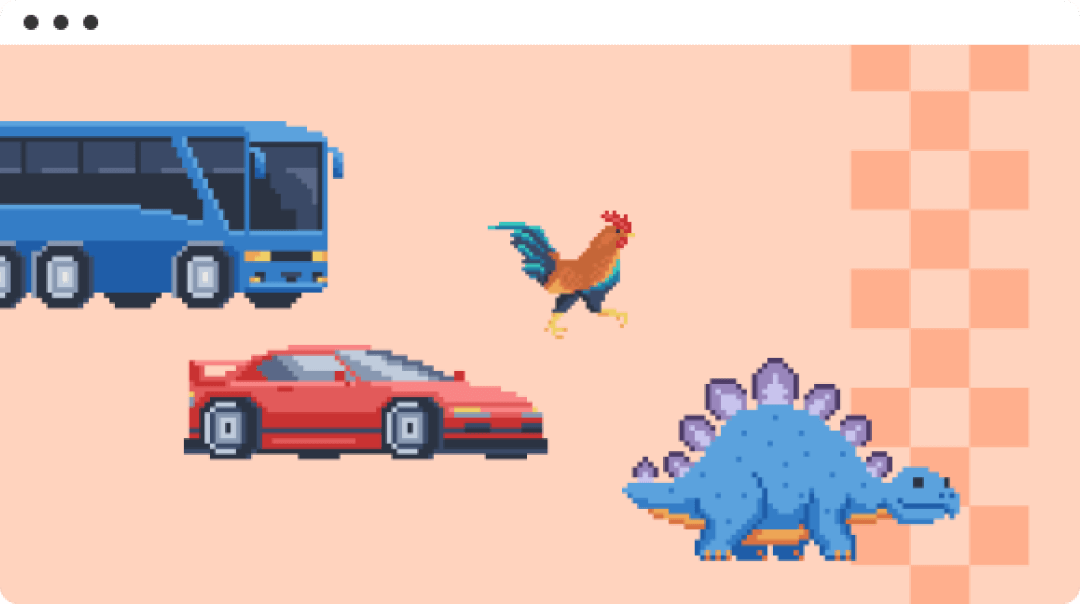
Group raceBe the best among the 4 cars. Choose a group race and leave all your opponents behind.Check it out
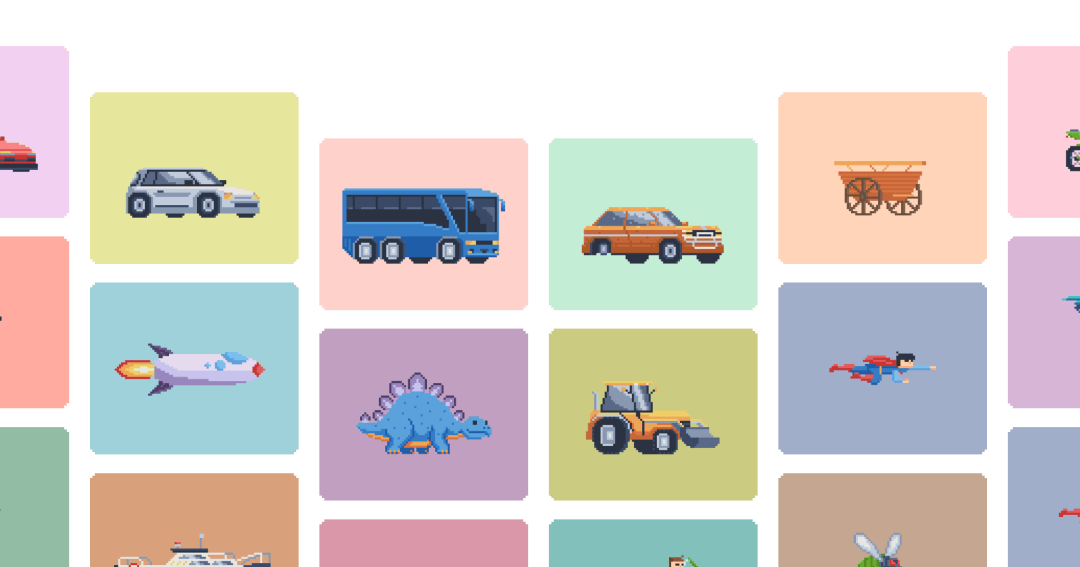
Rust Cup NFT-collectionSpecial for the game, we have created a collection of unique NFTs in pixel-art style. Each model has its own characteristics, a unique name, picture and description, and keeps a history of racing. Every win in the Rust Cup Game increases your token value
FAQThe Rust Cup Game is an indirectly controlled racing rally. The player purchases racing cars in the form of NFT tokens. In paid races for 4 competitors, the player can win the 1st or the 2nd place, recoup the cost of the car and start earning.How was the game created?How much it costs and how to get NFT machines?Currently, the NFTs are only available on the Grandbazar marketplace secondary market. In the nearest future, the team will expand the collection with new models. You can also win an NFT in Rust Cup telegram channel.
Lynxee NFT Collection
Rust based smart-contract for the #NFT Lynxee project on Elrond’s network
Install
compile contract
erdpy contract build
run mandos tests
erdpy contract
Note: Sometime when you are updating the contract interface, the build failed without rust error. Just remove the meta crate cache and re-build.
IPFS test collection
First steps — setup the collection — owner only
At this step, the collection is almost ready (the mint requires to be activated), we can start the mint journey.
Everyone can mint, it costs EGLD, this action will be on our dapp (website).
Structure
List of the methods and storage. The checkbox checked indicate that the feature is tested using mandos.
Note: Using RipGrep (grep rewritten in rust), you can quickly generate the API
make it executable (may require «sudo» before)
chmod +x ./bin/generate_api.sh
Generate API
./bin/generate_api.sh
Endpoints

We will reserve 300 NFTs
Then for the 2700 left item, the price will grow by mint count steps from 0.1 EGLD to 0.4 EGLD.
Note: The 10 first NFT (4 for the team, 6 auctions) from id 1 to 10 will be locked. Only the owner can mint and transfer it.
Test deploy on prod
Images built using HashLips.
We will deploy 50 lips + 10 reserved images on IPFS using nft.storage (car format)
Then regenerate (still with HashLips) json files and create manually the 10 reserved.
Images: bafybeidfyg4tkxazcrih3eaocpwn4m67vyhcuocrujwple6yjolxktniqm
JSON : bafybeiewbfwy2c33zzrn6u57z6ymni4jixdscryj7jovyuiknsklfqb4n4
Note: For this test, the uniques are the first 10 from 1 to 10, but the SC and the real collection will have 16 uniques at first from 1 to 16.
Once the assets uploaded on IPFS, we can deploy the contract on the testnet
SC Owner: erd1xe52d0yvd5q9r8t2jh73gqq6mkxzzmmd72l7padm630ksa0jjg9qypwlta
For each scripts in the ./bin folder, look inside the variable before running it.
Deploy the SC
./bin/deploy.sh
will generate the contract address, copy it to paste it in all next steps
Issue the Token
./bin/issue.sh
Set the roles to be able to mint
./bin/set_roles.sh
Now the contract and the token are ready to work.
./bin/add_wl.sh adress
/(Un)comment the of mint (bulk/single)
Mint: Cost EGLD — Public — Random id
./bin/mint.sh
/Add wallets filenames into ./bin/bulk_mint.sh
./bin/bulk_mint.sh
Giveaway: Send one random, one precise or many NFt to an address
See more about params in the file itself
./bin/giveaway.sh
Start public sale
./bin/startpublicsale.sh
Pause public sale
./bin/closepublicsale.sh
NFT Market Reference Implementation
A PoC backbone for NFT Marketplaces on NEAR Protocol.
TODO / DONE
High level diagram of NFT sale on Market using Fungible Token:
Differences from nft-simple NFT standard reference implementation:
Working
Frontend App Demo: /test/app.test.js/
App Tests: /test/app.test.js/
🚨🚨🚨 End of Warning 🚨🚨🚨
Associated Video Demos (most recent at top)
Detailed Installation / Quickstart
There’s 3 main areas to explore:
The tests are set up to auto generate the dev account each time you run test:deploy e.g. you will get a new NFT contract address each time you run a test.
This is just for testing. You can obviously deploy a token to a fixed address on testnet / mainnet, it’s an easy config update.
Guests Account (key and tx gas sponsorship)
Finally, the guest upgrades themselves to a real NEAR account, something demoed in the video.
It’s a lot to digest but if you focus on the /test/app.test.js you will start to see the patterns.
Background
Beyond having npm and node (latest versions), you should have Rust installed. I recommend nightly because living on the edge is fun.
Also recommend installing near-cli globally
npm i -g near-cli
Everything else can be installed via:
yarn
cd server && yarn
NEAR Config
There is only one config.js file found in src/config.js, this is also used for running tests.
Using src/config.js you can set up your different environments. Use REACT_APP_ENV to switch environments e.g. in package.json script deploy.
You can run unit tests in the Rust contracts themselves, but it may be more useful to JS tests against testnet itself.
Note: to run the app and server tests make sure you install and start the server.
If you’ve changed your contract or your dev account has run out of funds use test:deploy, if you’re updating your JS tests only then use test.
Test Utils
There are helpers in test/test-utils.js that take care of:
You can change the default funding amount for test accounts in src/config.js
Using the NEAR Config in your app
In src/state/near.js you will see that src/config.js is loaded as a function. This is to satisfy the jest/node test runner.
You can destructure any properies of the config easily in any module you import it in like this:
Note the export const in the destructuring?
Now you can import these like so:
React 17, Parcel with useContext and useReducer
:
:
store Provider
state dispatch update
Usage in Components
Example of a call:
All dispatched methods and update calls are async and can be awaited. It also doesn’t matter what file/module the functions are in, since the json args provide all the context needed for updates to state.
update getState dispatch
:
:
: :
:
: :
: : :
Prefixing store and Provider
The default names the State factory method returns are store and Provider. However, if you want multiple stores and provider contexts you can pass an additional prefix argument to disambiguate.
Performance and memo
The updating of a single store, even several levels down, is quite quick. If you’re worried about components re-rendering, use memo:
message
Hello
Higher up the component hierarchy you might have:
When the button is clicked, the component HelloMessage will not re-render, it’s value has been memoized (cached). Using this method you can easily prevent performance intensive state updates in further down components until they are neccessary.
Делаем смарт-контракт
Само децентрализованное приложение я сделал на блокчейне NEAR, развернув проект через create-near-app, в папку для контракта я скопировал весь код из rusty-checkers, добавил в главную библиотеку lib.rs импорт файлов игры, заменил функции вывода (долой println! ), убрал методы для stdin и stdout и по минимуму обновил код согласно велениям времени, например, принудительно дописал dyn для всех Trait объектов. В общем, смиренно подчинился всем требованиям великого и ужасного компилятора Rust и меньше чем через полчаса мой код уже компилировался. Пришло время обновить логику.
Как было
Старая функция main() работала примерно так:
stdin().read_line(&mut line);let parse_result = checkers::parse_move(&line);
let move_result = apply_positions_as_move(&mut game, positions);
Как стало
Этот код я сократил до функции make_move, которой в качестве входного параметра передается game_id и line (строка с ходом, ведь клавиатуры в блокчейне у нас нет). Далее мы:
let mut game: Game = self.games.get(game_id).expect(«Game not found»);
assert_eq!(game.current_player_account_id(), env::predecessor_account_id(), «ERR_NO_ACCESS»);
let parse_result = input::parse_move(&line);
let move_result = util::apply_positions_as_move(&mut game, positions);
Получается, что перед тем как сделать ход, контракт «читает» состояние игры, запускает написанную ранее в rusty-checkers механику проведения хода, а потом, если были изменения, записывает состояние доски назад в хранилище. Чтобы не хранить в блокчейне вычисляемые значения, создаем объект GameToSave, в котором находятся:
Player_1, player_2 — имена аккаунтов игроков, reward — размер награды за игру и указание адреса контракта токена, в котором выплачивается награда, winner_index — индекс победителя (0/1), сам объект тут имеет тип Option, то есть может не иметь значения. Turns — количество сделанных в партии ходов, выводится на UI. Last_turn_timestamp — время сделанного последнего хода и total_time_spent — массив потраченного каждым игроком времени, для того, чтобы можно было принудительно остановить партию, если один из игроков потратил слишком много времени. Board — объект с игровой доской, current_player_index — индекс текущего игрока (0/1) оставлены из оригинального кода. BorshDeserialize, BorshSerialize — сериализации Borsh для Rust.
Что мы должны сохранять в состоянии контракта:
Можно заметить, что в коде используется два разных хешмапа, один LookupMap и другой UnorderedMap, их отличие тут в том, что UnorderedMap поддерживает итерации и позволяет вывести, например, список всех активных игроков. Для LookupMap такой возможности нет, но у нас и нет необходимости «пробегать» в цикле все сыгранные игры, так как оппоненты будут запрашивать данные о своей игре по game_id, который они уже знают, а фронтэнды смогут считывать данные о текущих играх из небольшого объекта available_games. За счет отсутствия сериализации ключей, работа с объектом LookupMap обходится дешевле по потребляемому газу.
Также пришлось написать функцию для распределения награды, капитуляции, сохранения статистики, реферальную систему и другие вспомогательные методы. Но это уже больше «рюшечки» на будущее.
Step 2. Writing the Mint Function Struct
First, let’s create the accounts struct for the mint function
Don’t worry about the Unchecked accounts, as we will pass these into the Metaplex program which will check them for us.
In order to use Unchecked accounts in Anchor, you need to add this comment above each account:
/// CHECK: This is not dangerous because we don’t read or write from this account
Add this topic to your repo
To associate your repository with the
topic, visit your repo’s landing page and select «manage topics.»
Some General Tips About Solana Development
In Solana development, you’ll face a lot of weird custom errors and bugs, and it can be quite hard and frustrating to fix them since the Solana dev ecosystem is not as big as the Eth dev ecosystem. But not to worry. When you get stuck you simply have to look in the right place for the solution.
During my development, I was constantly asking my doubts in the Anchor discord server, the Metaplex and Superteam server, and looking through other code repos on GitHub and the Metaplex Program library itself.
Prep work
solana config set —url devnet
To confirm if it worked, check the output after entering the cmd:
Lastly, use anchor CLI to make an anchor project with this command:
Make sure that Anchor.toml is also set to devnet.
That’s it now. You are all set to eat glass!
Делаем фронтэнд
С фронтендом получилось “разобраться” еще проще. Код на JS из взятой имплементации принимает игровое поле как объект 8 * 8, где 0 — пустая клетка, 1 и 2 — шашки игроков.
Чтобы сделать преемственность данных, я дописал свою функцию вывода игрового поля, которая переводит абстрактные классы шашек в такие же числа, а дамки (King) я закодировал отрицательными числами.
Пример кода для вывода поля
Далее потребовалось научиться считывать ходы, сделанные на моем форке UI в понятном для Rust-кода виде, разворачивать на 180 градусов доску для второго игрока, блокировать поле, пока к нужному игроку не перешел ход. Для интерактивности я обновляю игру по таймеру, благо вызовы чтения из блокчейна бесплатные. Это всё было сделано на максимально убогом JS-коде, ссылаться на него мне стыдно, хотя он и работает.
В качестве «клея» между смарт-контрактом и JS кодом фронтенда я использовал near-api-js, там можно инициализировать контракт, указать доступные методы и потом вызывать их с необходимыми параметрами в виде простых js-вызовов: осуществляющих чтение (viewMethods) и запись (changeMethods).
Потом запустить игру можно, например, вот так:
Где GAS_START_GAME — константа для прикладываемого к транзакции газа, а deposit — сумма ставки в токенах.
Итого процесс выглядит примерно так,
Improve this page
Add a description, image, and links to the
topic page so that developers can more easily learn about it.
Curate this topic
Next steps
Ready to start? Jump to the Pre-deployed Contract tutorial and begin your learning journey!
If you already know about non-fungible tokens and smart contracts, feel free to skip and jump directly to the tutorial of your interest. The tutorials have been designed so you can start at any given point!
👉 Join us on Discord and let us know in the #development channels. 👈
We also host daily Office Hours live where the DevRel team will answer any questions you may have. 🤔
Monday – Friday 11AM – 12PM Pacific (6PM – 7PM UTC)
Here are
109 public repositories
matching this topic.
Stargaze NFT and Launchpad smart contracts
The NFT Geyser plugin that powers metaplex APIs
Cryptopunks Substreams module
An open source, high performance, backend for the Seaport smart contracts.
Canonical Program Parsing from Geyser Plugins
Python bindings for the Solana Rust SDK
Smart contracts maintained by the Metaplex team
Core functionality for the BitMask wallet
𝕊 The Secret Network
Candy Machine Rust CLI.
Smart contract framework for building NFT based applications — Built with CosmWasm
Extracts IDL from Solana Rust contracts
Solana Account Firewall
Nft contract on sway using ERC721 standard
Mintbase Core NFT store factory contracts
The Metaplex NFT-standard Swiss Army Knife tool.
Добавляем NFT
Приправляем игру NFT-косметикой: если игрок купил NFT-токены со специального контракта то он и его соперники будут видеть графику из NFT на шашках этого игрока.
Имплементация NFT оказалась самой простой, тут я тоже задействовал чужой код, но на этот раз из core_contracts для блокчейна NEAR. Создал новый контракт и импортировал библиотеки:
near_contract_standards::impl_non_fungible_token_core!(NfTCheckers, tokens);
near_contract_standards::impl_non_fungible_token_approval!(NfTCheckers, tokens);
near_contract_standards::impl_non_fungible_token_enumeration!(NfTCheckers, tokens);
Все базовые функции NFT сразу стали доступны в контракте, поэтому функция nft_mint для создания NFT всего лишь проверяет доступ текущего пользователя и вызывает стандартный метод, передавая туда данные для токена:
Чтобы уменьшить количество кода, я задействовал библиотеку web4 и добавил функцию генерирования css-файла для каждого отдельного токена, где задается название токена и аккаунт владельца токена.
Этот код выдает из NFT-контракта примерно такой css-стиль:
Осталось только добавить в интерфейс функцию, которая читает NFT-токены, хранящиеся на аккаунтах игроков и подгружает соответствующие им css-файлы.
Всё готово! Мы сделали игру, логика которой целиком хранится в смарт-контракте на блокчейне и где есть реальное использование NFT! Один ход в игре стоит ~$0.006, что еще можно оптимизовать при желании.
Fork me on Github
Если вы захотите встроить в созданный мой контракт другие игры, то для этого надо подключить файлы с новой логикой от новой игры, заменить функцию make_move и сохранение/вывод игрового поля, и вуаля — вот вам готовые крестики-нолики, шахматы, го или более сложные настольные игры. Кто будет делать, пишите мне в телеграм, вместе поиграем!
Ссылка на репозитории: контракт, UI.
I haven’t implemented Collections, as it’s not in the scope of this guide but you can do it by using:
Regarding why I’ve set Max supply to 0 here. In Metaplex, if the token is meant to be one of a kind, then you have to set its max supply to zero since total supply — supply claimed (1–1) equals 0
Once you’ve written the function run anchor build && anchor deploy and you should see the deployed Program ID
paste this program ID in your Anchor.toml and the lib.rs file wherever you see this default ID Fg6PaFpoGXkYsidMpWTK6W2BeZ7FEfcYkg476zPFsLnS
In this how-to, you’ll learn how to mint an NFT on Solana by writing a Rust smart contract and using Metaplex’s Token Metadata Program
I hope this guide was useful for all the Solana geeks out there. When I first tried to mint an NFT, I was pulling my hair out, but it slowly started to make sense once some fellow glass eaters explained it to me. Hopefully, I’ve made it that much easier for you.
Here’s the GitHub for this project:
Big thanks to Pratik Saria and 0xDeep for helping me understand how Solana NFTs and Anchor works. If it weren’t for them, I’d still be trying to figure it out.
Prerequisites
To complete these tutorials successfully, you’ll need:
New to Rust?
If you are new to Rust and want to dive into smart contract development, our Quick-start guide is a great place to start.
Step 3. The Mint Function 🪙
Let’s make a function that uses the struct we just made to mint the token:
Step 4. Calling the Mint Function
Now let’s make the token and the associated token account, as shown below:
Note: the mint and freeze authority has to be same otherwise it doesn’t work.
createInitializeMintInstruction( mintKey.publicKey, 0, program.provider.wallet.publicKey,// mint auth program.provider.wallet.publicKey // freeze auth ),
Now, call the mint function and pass all the data and accounts
That’s it! Now just run the anchor test, and you should be able to mint your NFT.
1 passing (7s)✨ Done in 9.22s.
If you get any custom program error with a hex value like 0x1, convert the hex value to plain text, then go to metaplex github and search using your browser for the number + 1 th appearance of the word “error(“
You can check out the NFT here:
Step 1. Import the Dependencies
Anchor has pulled down all versions before 0.24.2 due to a security vulnerability hence make sure to use this exact one
Then go to the lib.rs file in src and import these:
Cool. Now we can write the mint function!